MailScheduler Product Guide

For the installation we refer to the enterprise installation manual overview page.
Automate the distribution of user-specific dashboards with MailScheduler. Determine the recipients, dashboards and format and schedule your information to be delivered to those who need it, when they need it.
Send expansive reports with multipage PDF’s, data for analysis with XLS or CSV’s and an update with an inline PNG of your desired dashboard.
Getting started
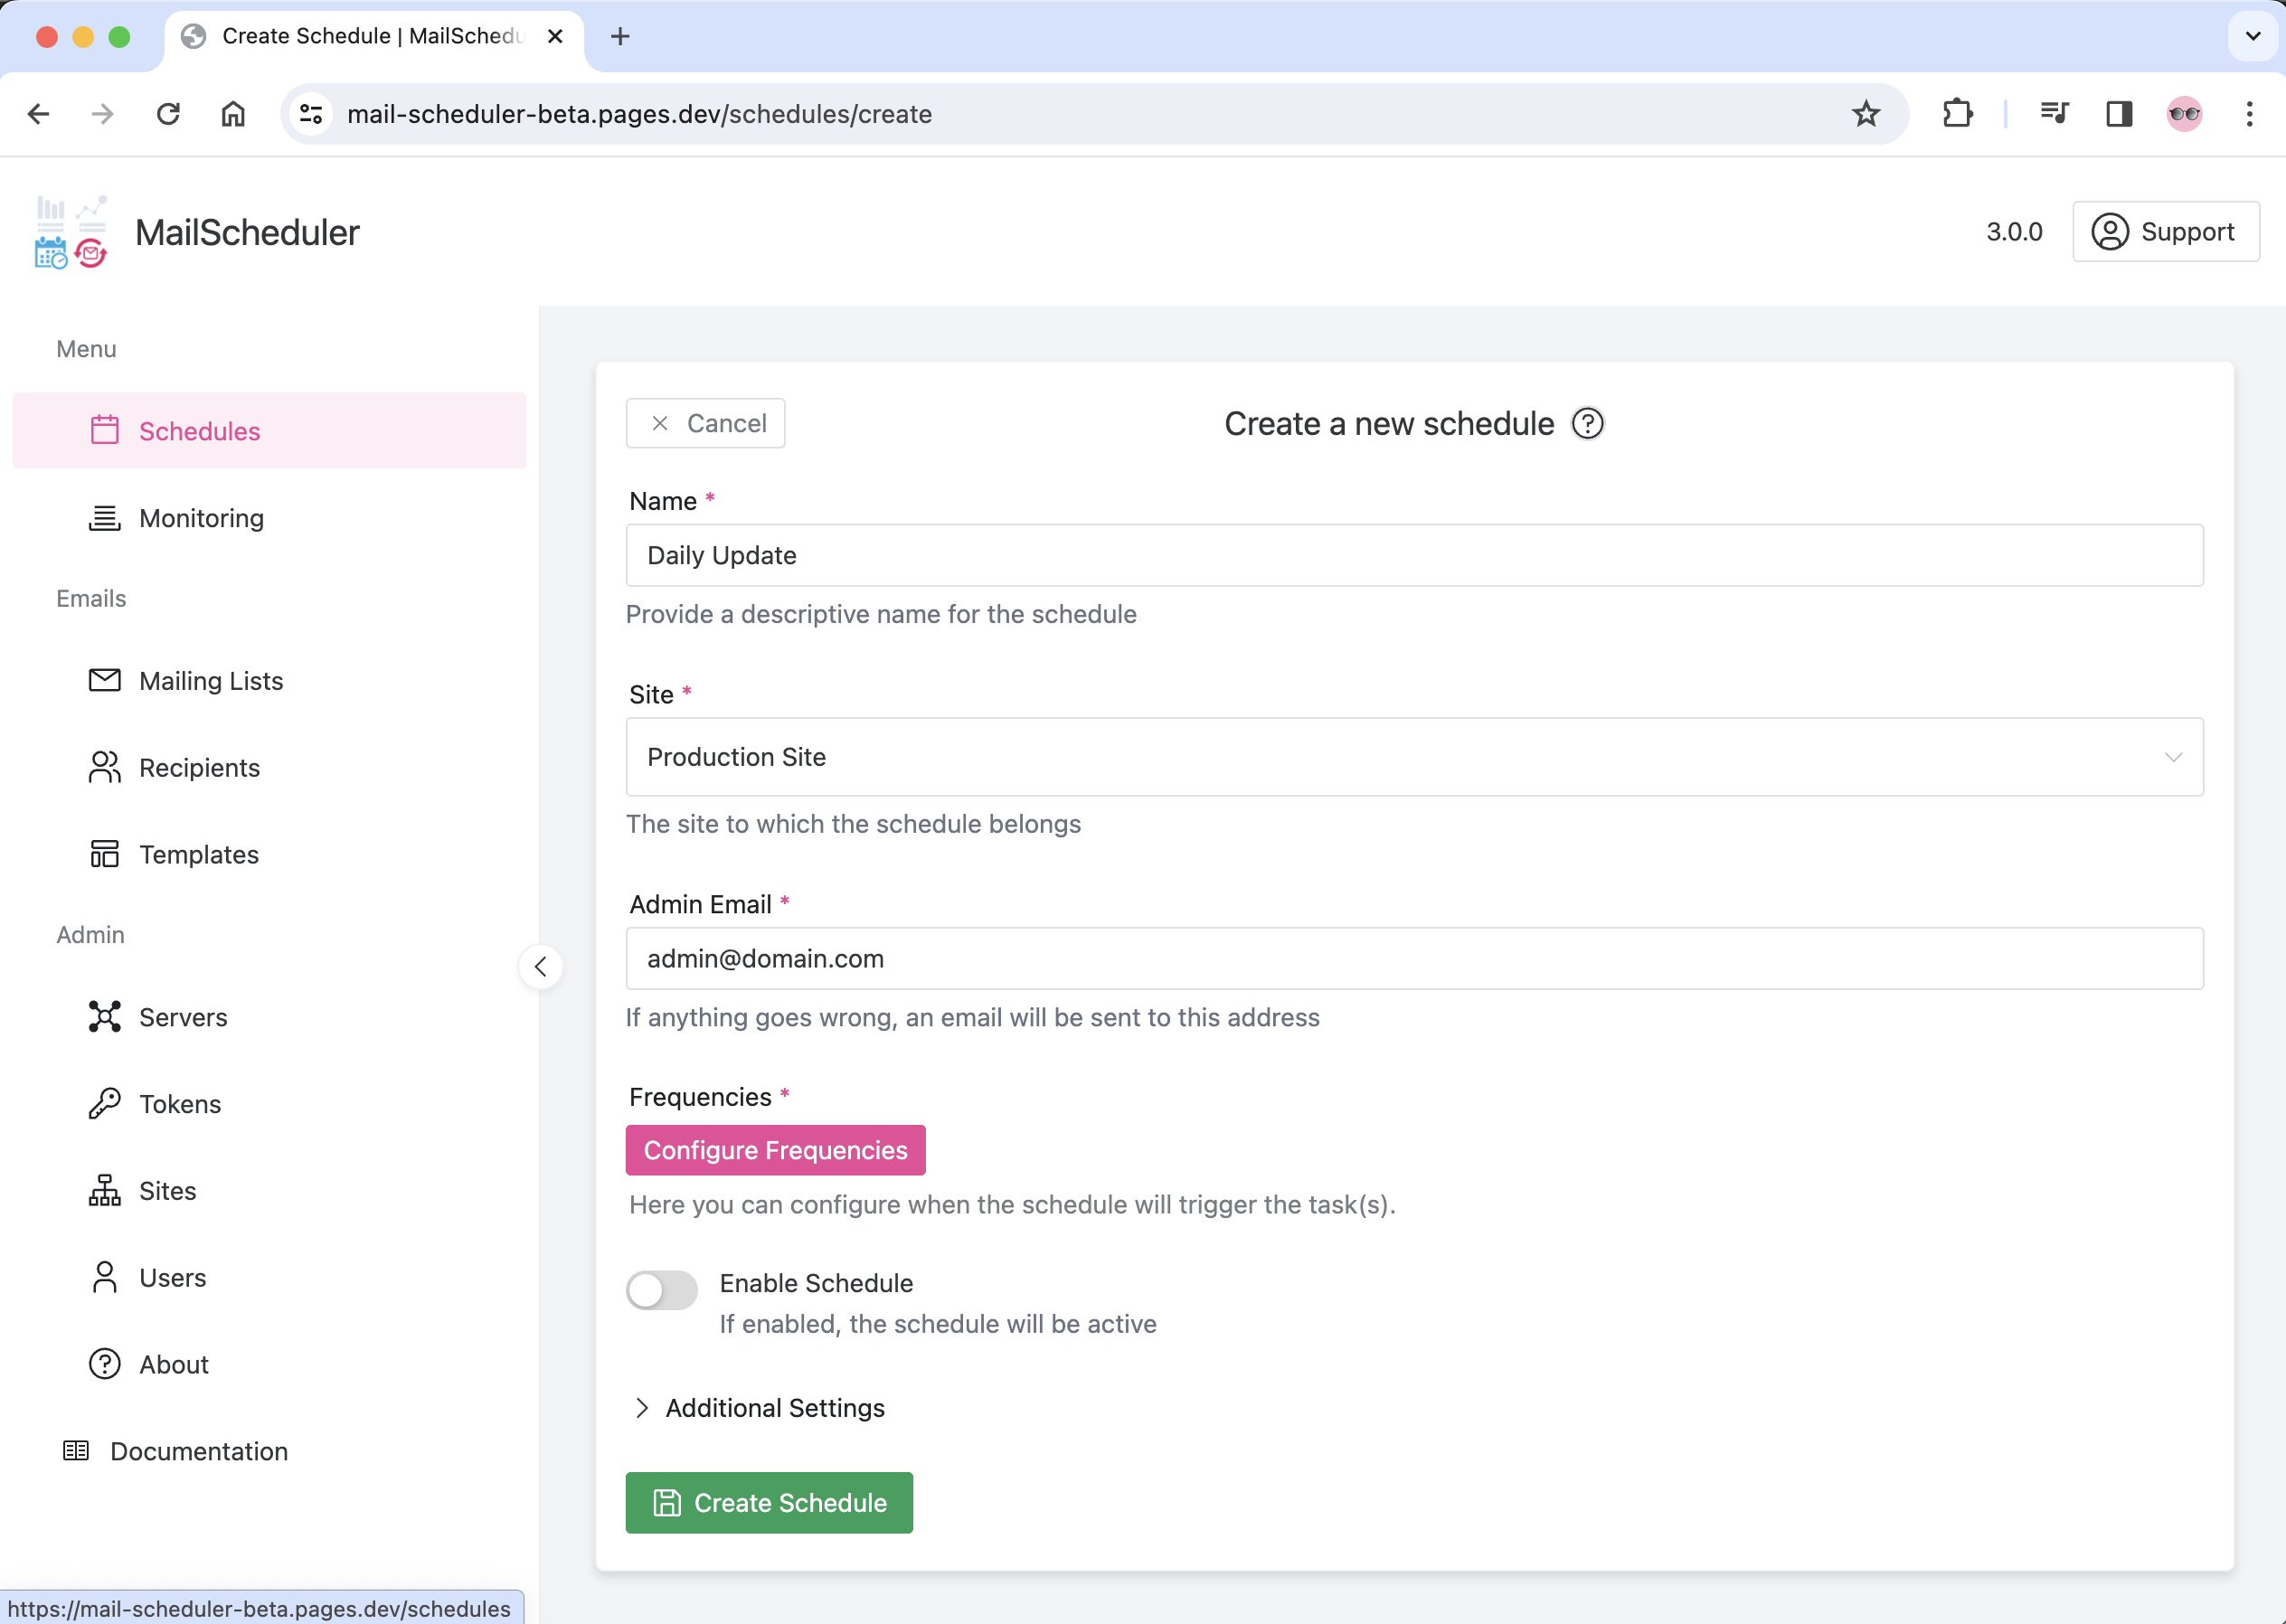
To start using MailScheduler, simply head over to the URL configured during installation and create your first Schedule.
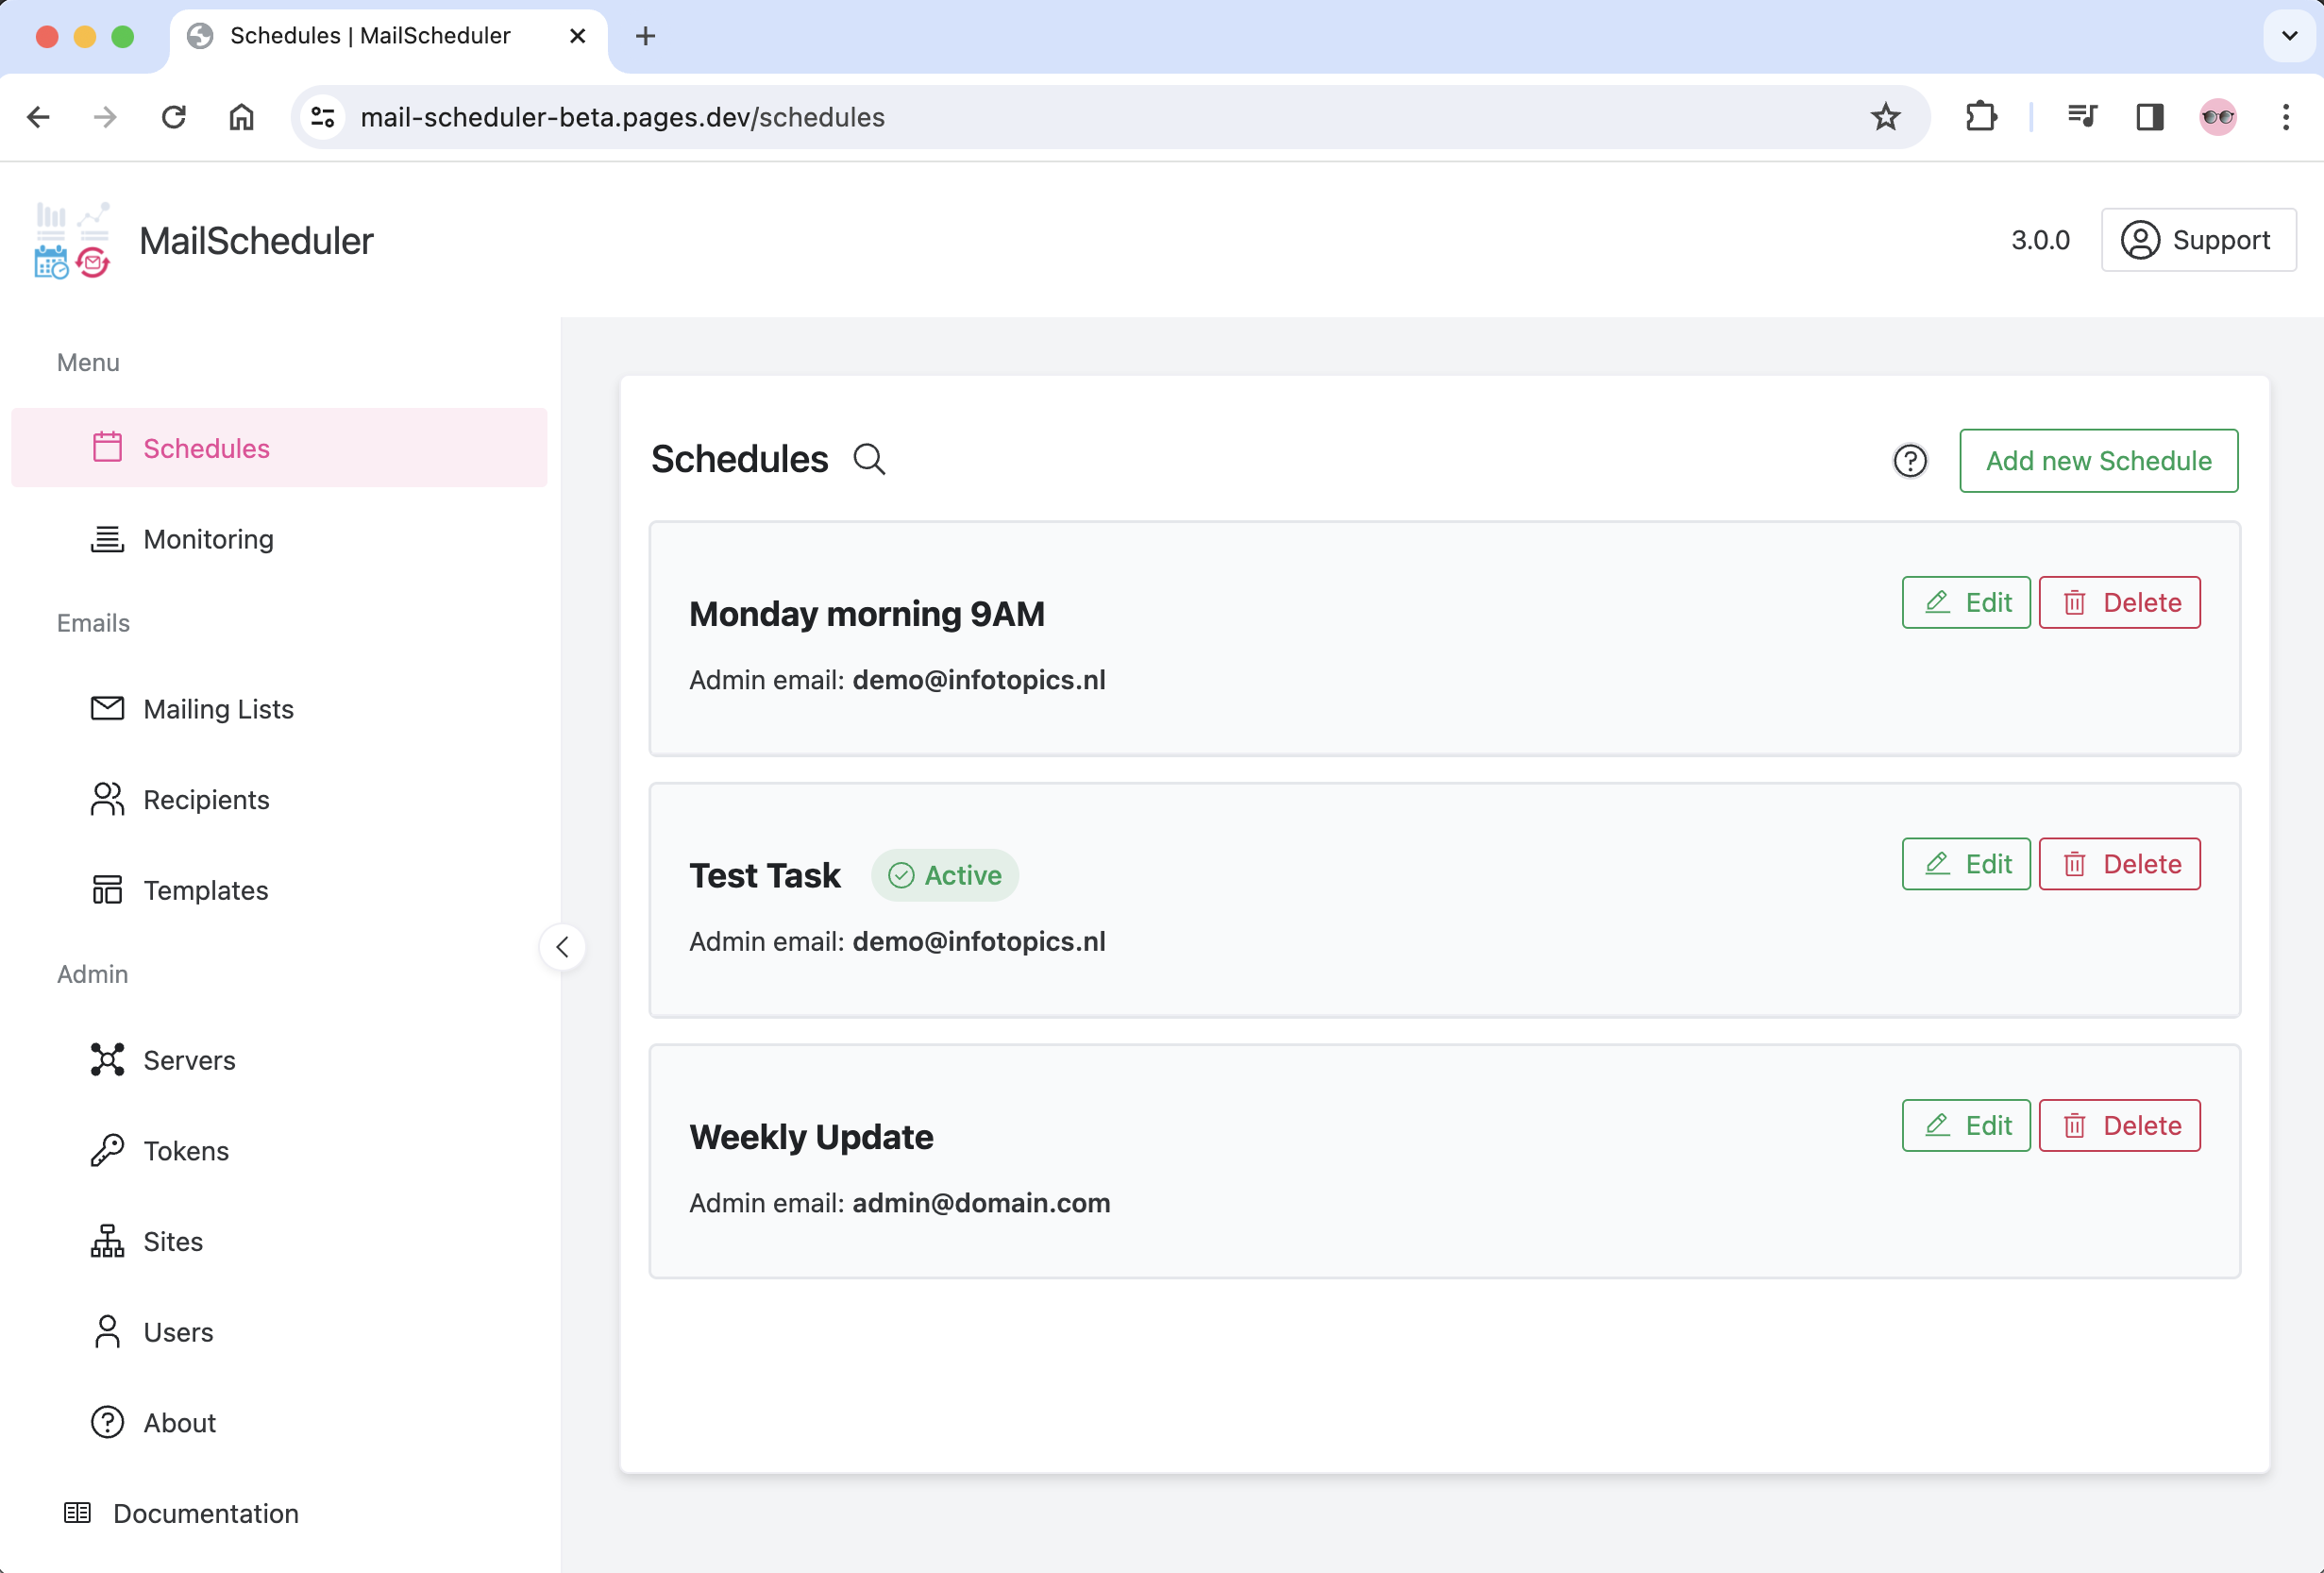
Schedules
Schedules determine when tasks are triggered, tasks determine what is sent and to whom it is sent. Sending out an email starts with configuration of the Schedule, followed by the underlaying Tasks. Before being able to create a schedule, the following resources must be configured (see relevant chapters):
- A Server
- A Token
- A Site
Adding Tasks can only be done after the Schedule has been created and saved. In the Schedule overview, navigate to the newly created Schedule to add Tasks.
Frequencies
The frequency determines when the schedule will trigger its tasks. There are several options:
- Hourly: Specify the time at which the schedule will trigger each hour, between what hours each day and if it should be triggered on weekdays, weekends or both
- On days of the week: Once per day at a specified time, the schedule will trigger. Which days of the week can be specified aswel.
- Every Month: once per month, on a specified day or on the first workday of the month, the schedule will trigger. Specify the time of day aswel.
- Every Quarter: once per quarter, on a specified day or on the first workday of the quarter, the schedule will trigger. Specify the time of day aswel.
Export/Import of Tasks
Tasks can be imported and exported to or from a schedule under “additional settings”. Exporting results in a CSV file that can be edited and reimported to the same or a new schedule.

Edit Tasks in CSV
To edit an existing task, leave the task_id in place. To create a new task, Leave it empty to create a single view in a task. When using multiple views in one task, please give it a fake id that does not yet exist in the database.
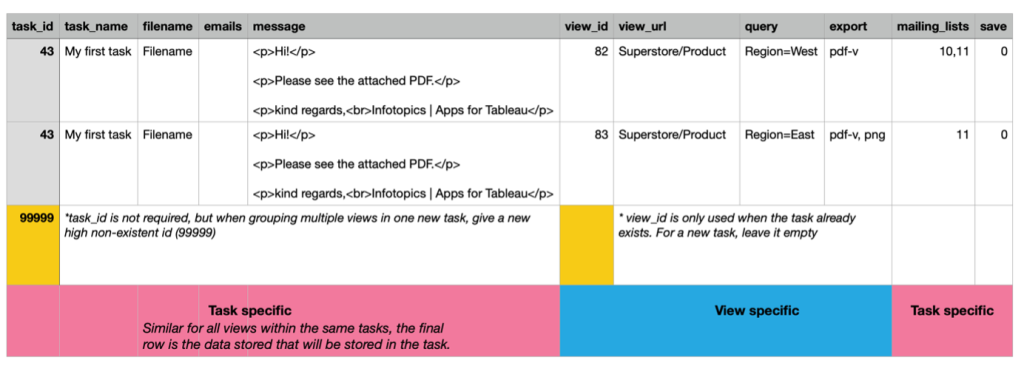
Task_id, task_name, filename, emails, mailing_lists, and save are settings that apply to one task. So multiple views within the same task should be similar. Otherwise, the MailScheduler will take the final row into account.
The view_id will be empty for new tasks. To update an existing view, leave the id the same. We recommend using each view in only 1 task and do not reuse a view. By filling the view_url (case sensitive!), the MailScheduler will search for the exact name match on your Tableau. You can put filtering queries in the query column, and multiple export types are supported: pdf-v, xls, csv, image.
When you are done editing the CSV file, import it again. Select choose file, select the CSV file, and hit upload.
Tasks
A schedule can consist of multiple tasks. We already know when to send it, now we need to specify what to send in the email. Tasks consist of the email settings, content, recipients, and Tableau views and filters.
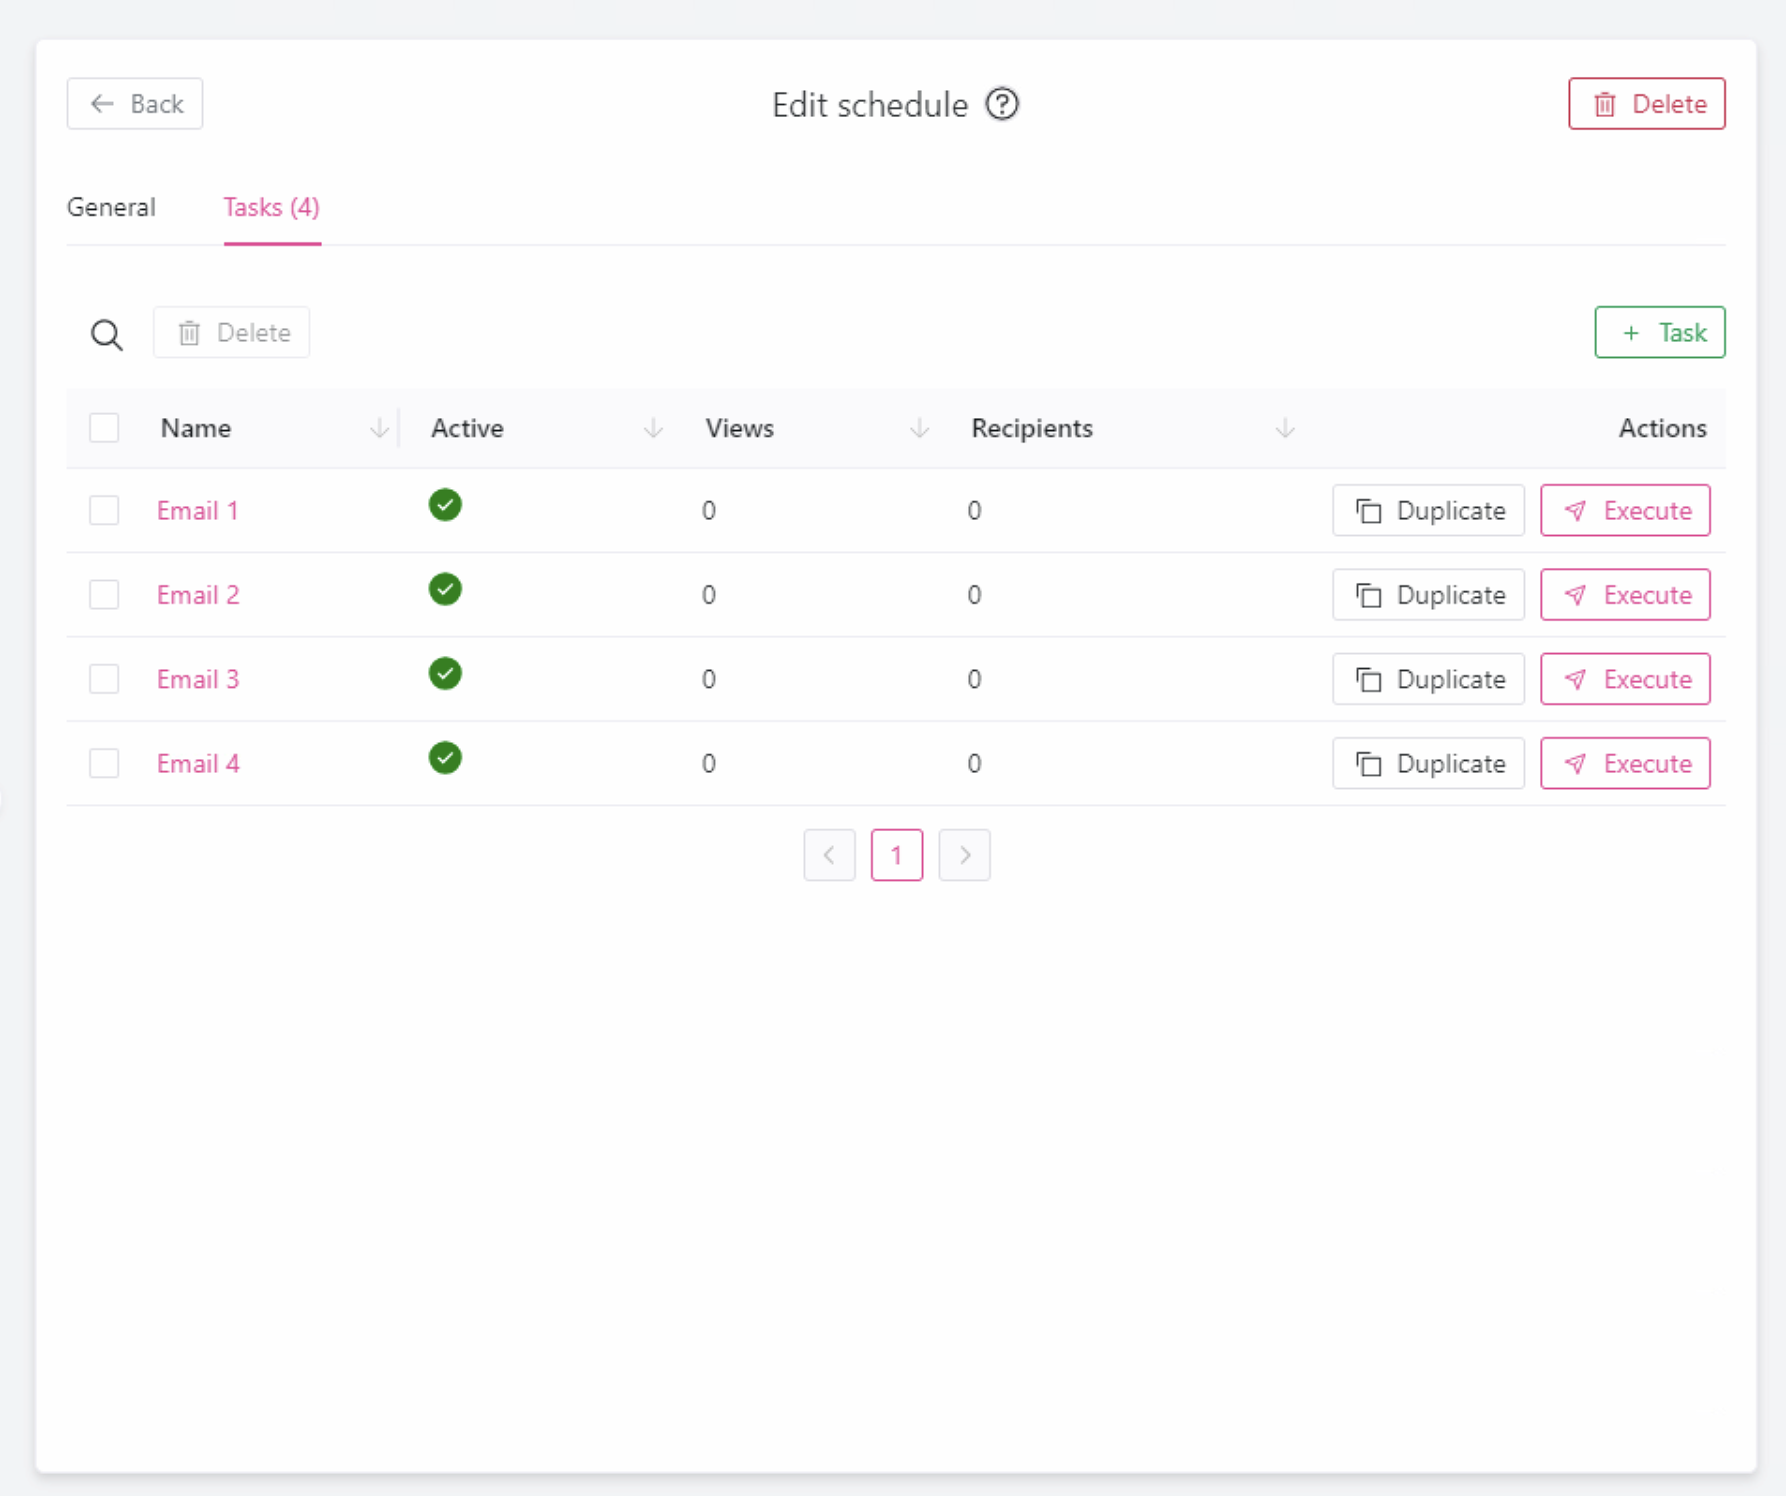
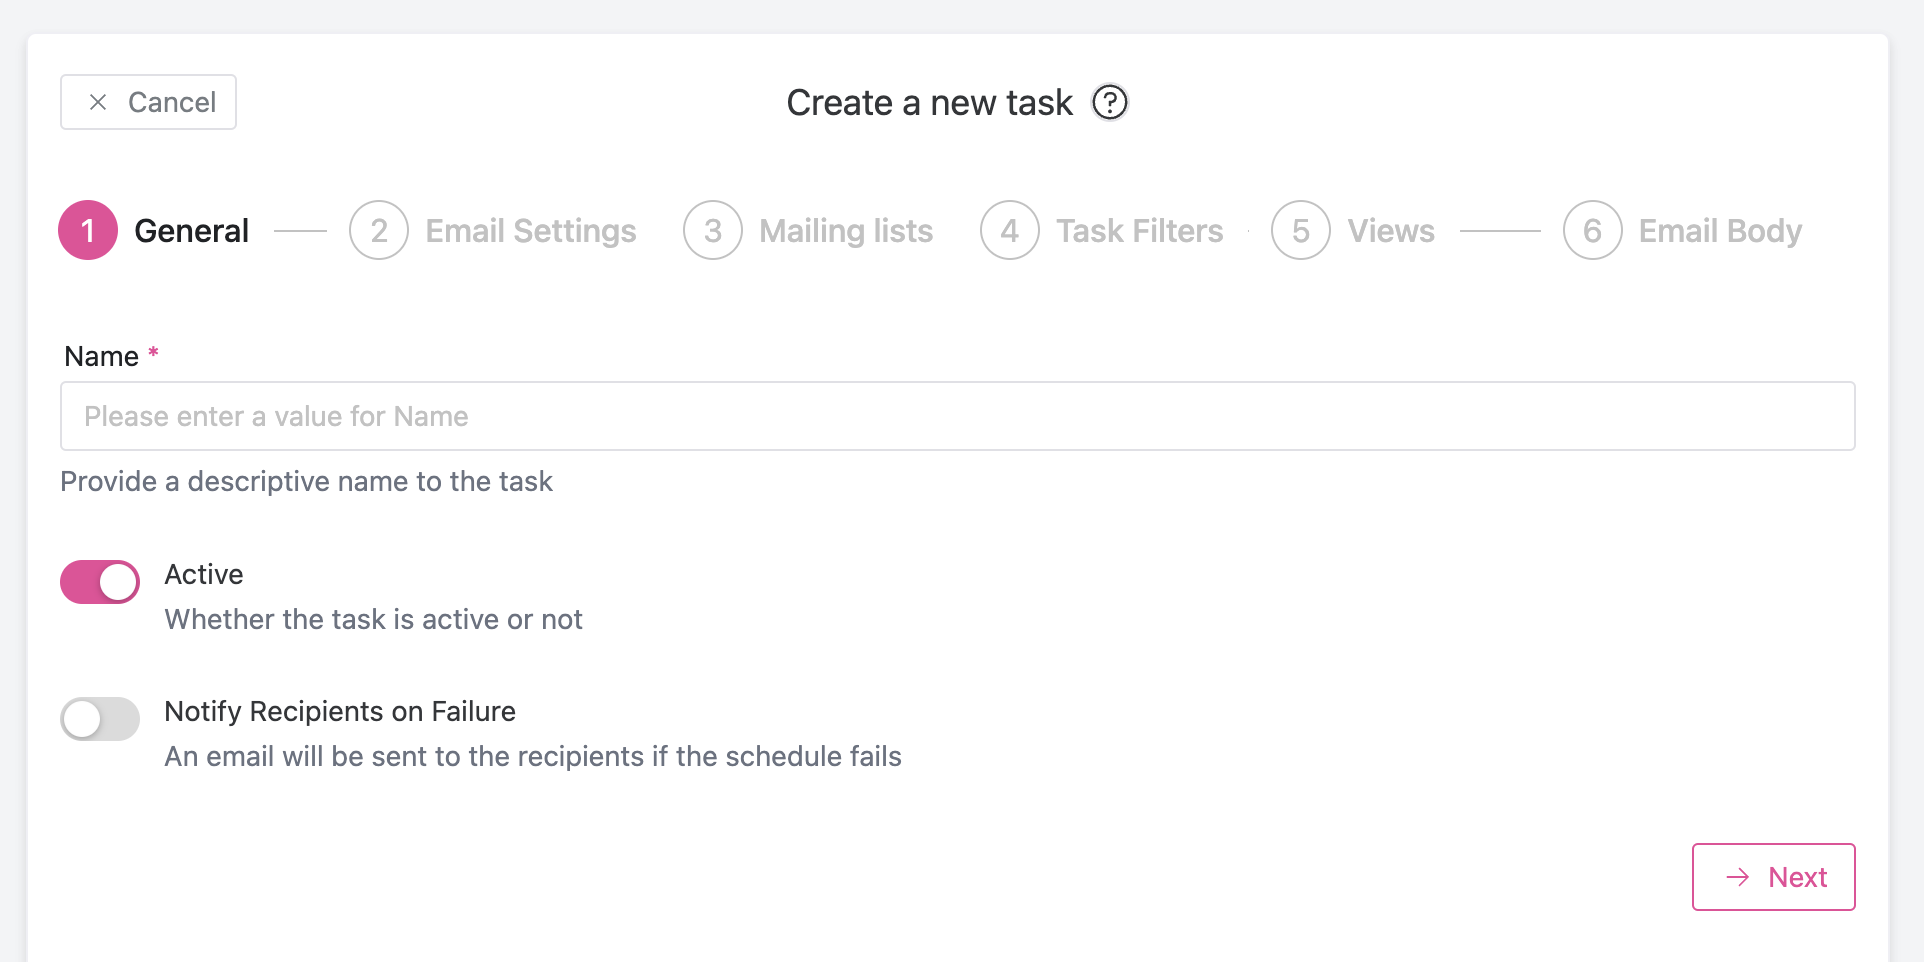
Create a new task
The steps to create a new task are described below. Detailed information is available through the “?” symbol in the application.
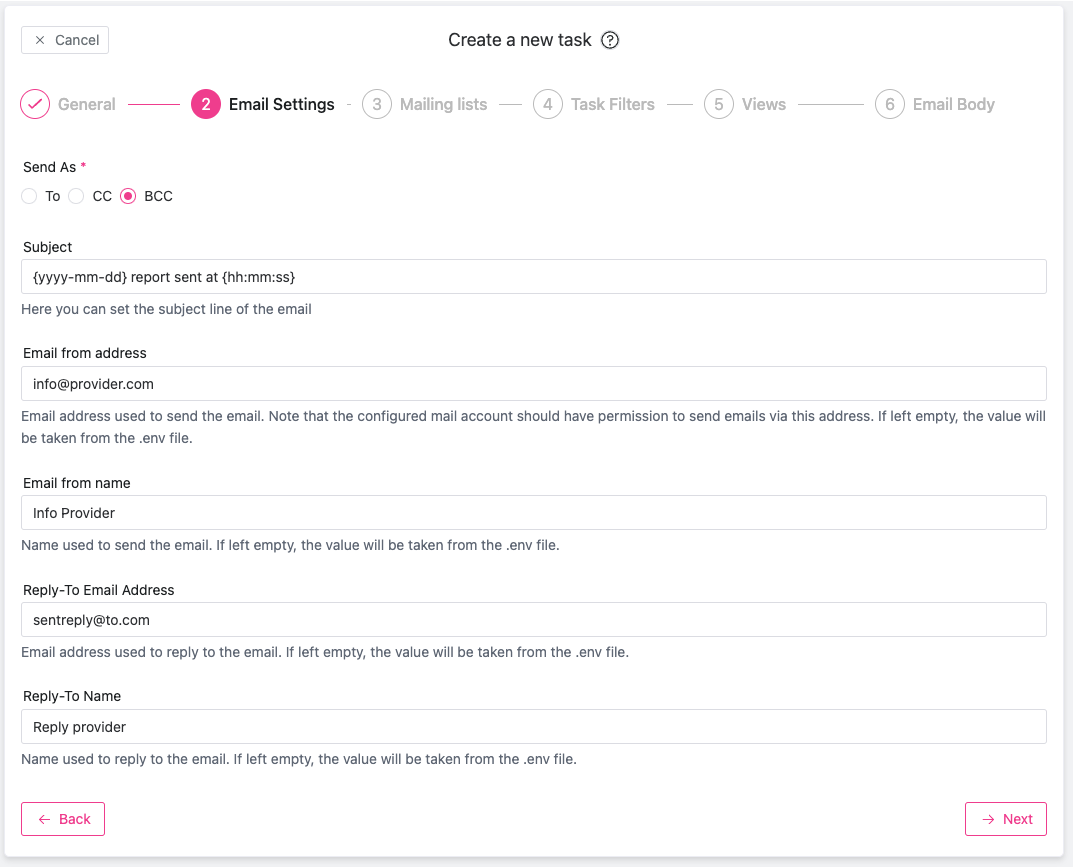
Email Settings
The subject line of a an email can contain the date using the following format: {yyyy-mm-dd hh:mm:ss}. Note: when lines are left empty, they will be pulled from the .env file used by MailScheduler.
Mailing Lists
Add recipients for the task, either through mailing lists or separately with email addresses. Using this last option only adds the email to this specific task without saving it as a recipient or as part of a mailinglist. For advanced configuration such as recipient or mailinglist filters, instead add the recipient to a mailinglist.
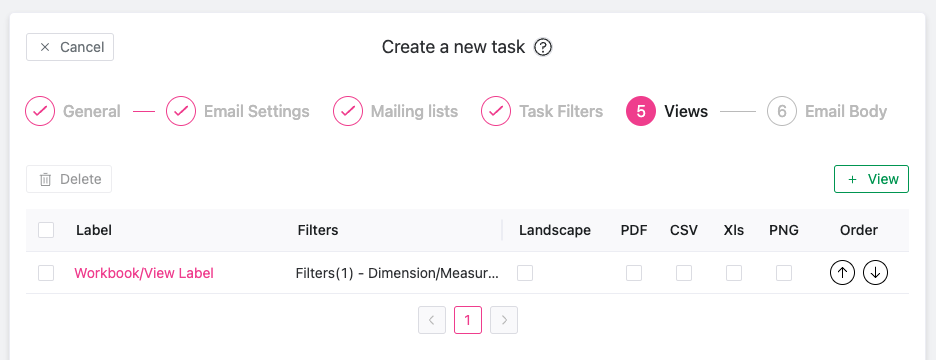
Views
A Task consists of views and an email body (message). A task can only access views from workbooks within the site that is associated with the Schedule the task is part of.
Select the workbook and view to be added to the task. For more information on applying filters in a View, see the Filters section of the guide. By selecting the checkbox, the corresponding export format is attached to the mail. All PDFs that are exported will be merged before they are attached, with the order of views from top to bottom being used to determine the order for the PDF. You can edit and delete the view by clicking the buttons in front of the view.
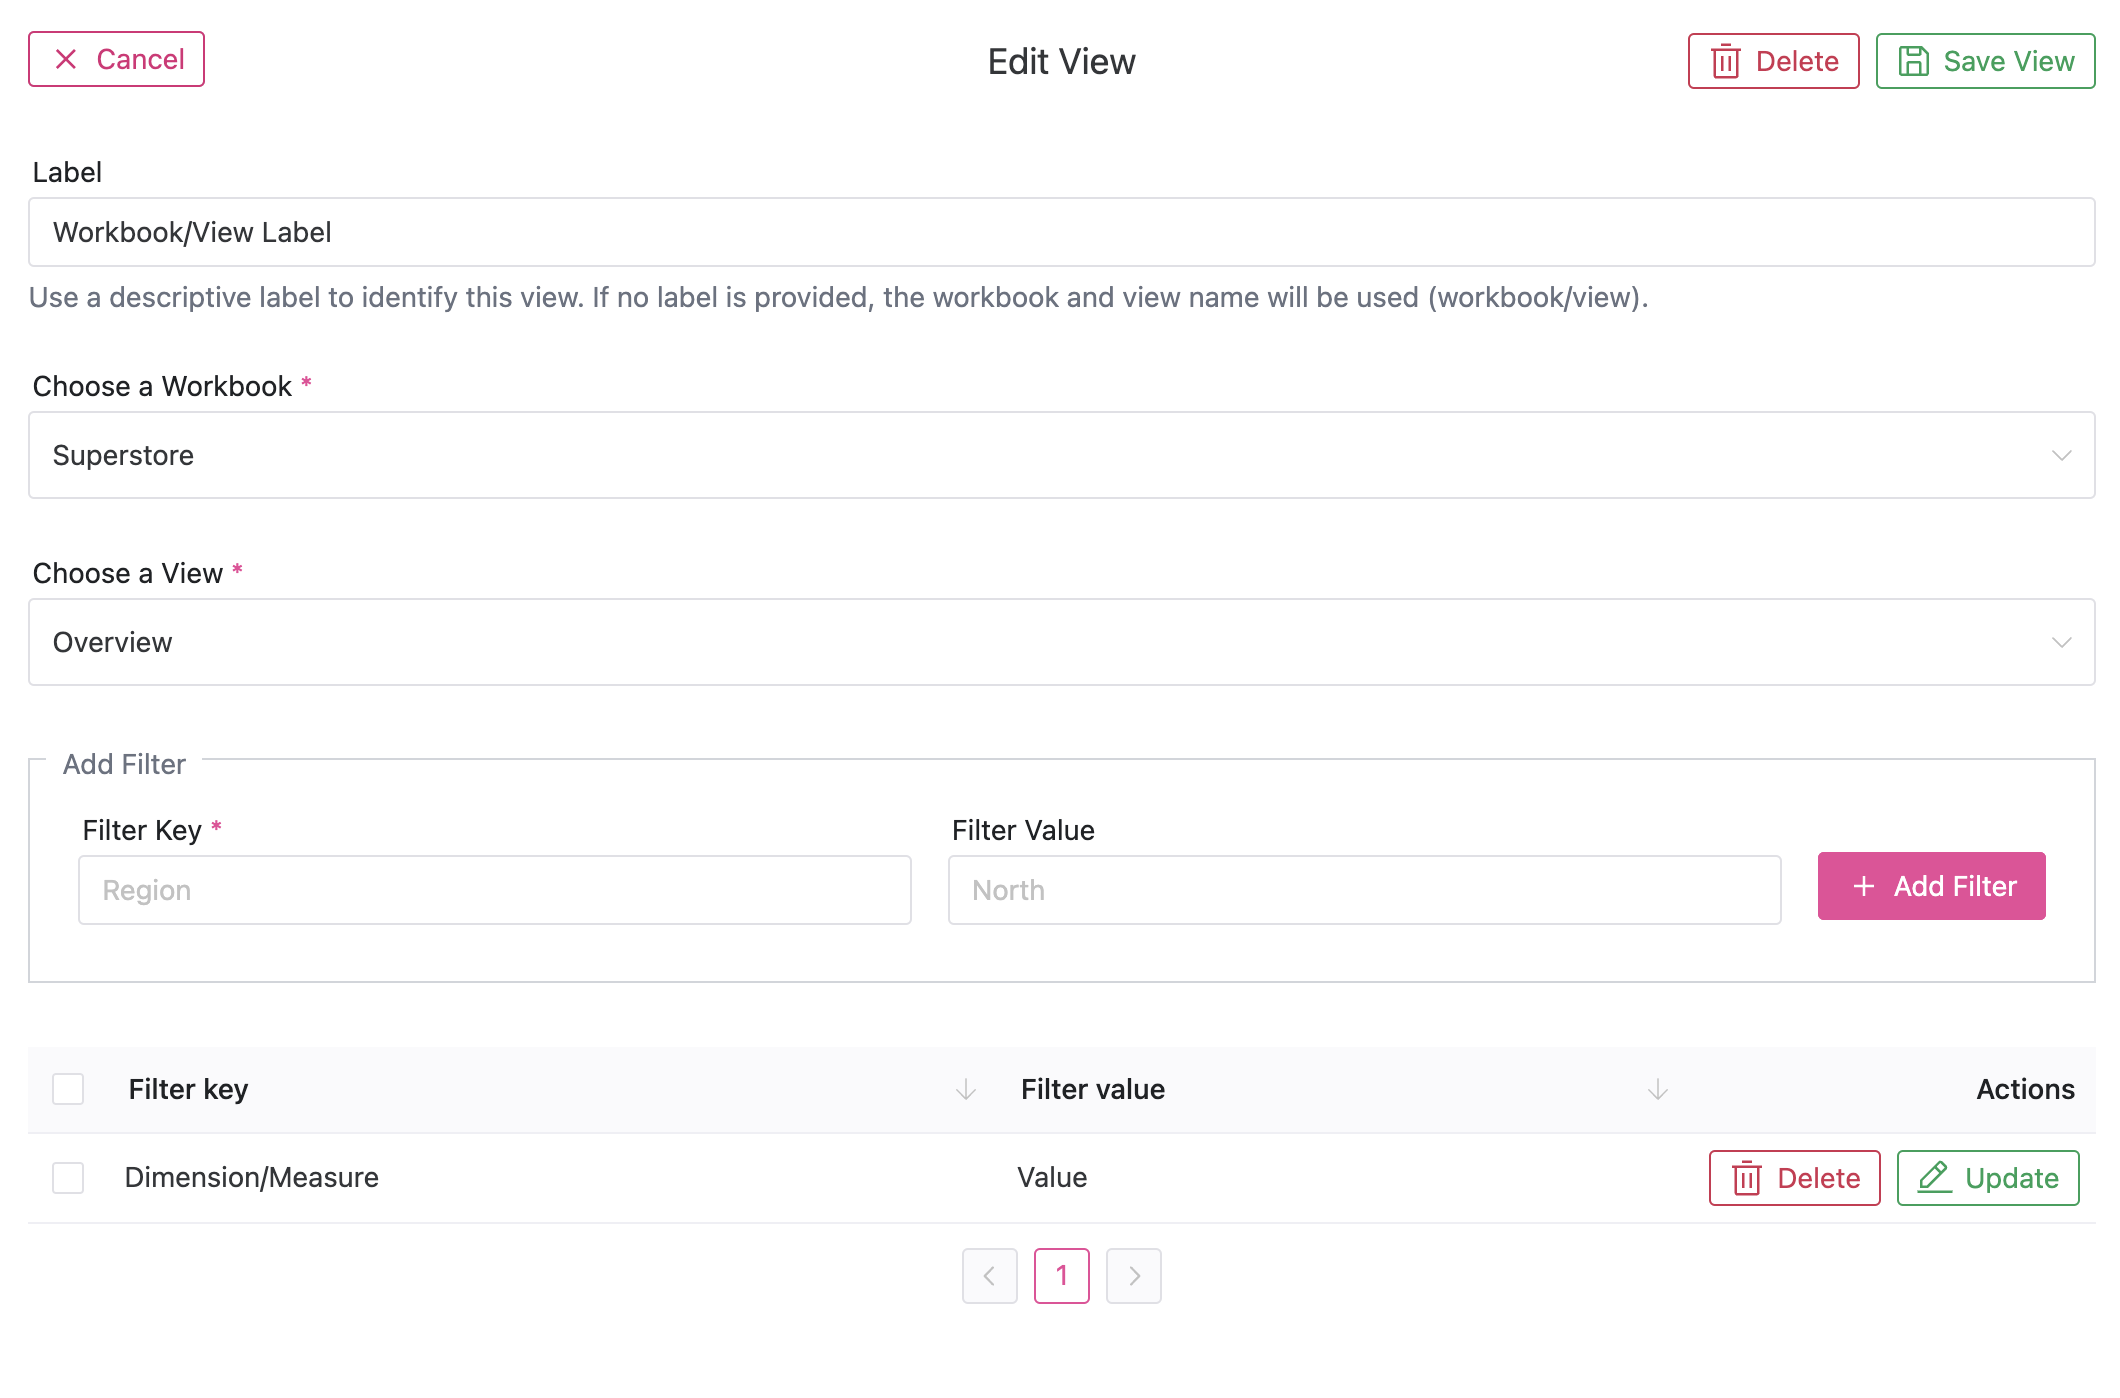
When creating a view, select the relevant workbook and view and add filters if required (for more details on filters, see the relevant chapter).

PDF filename and CSV options only apply when one or more views use the PDF or CSV format.
Email Body (Message)
In the message, we can create the email content, this will be the message your users will receive in their email. Each element in the email can consist of either an image or text, with the ability to save templates for reuse.

Rich text
Add your content in the rich text box, you can format your message such as changing the style, linking websites and adding inline images.
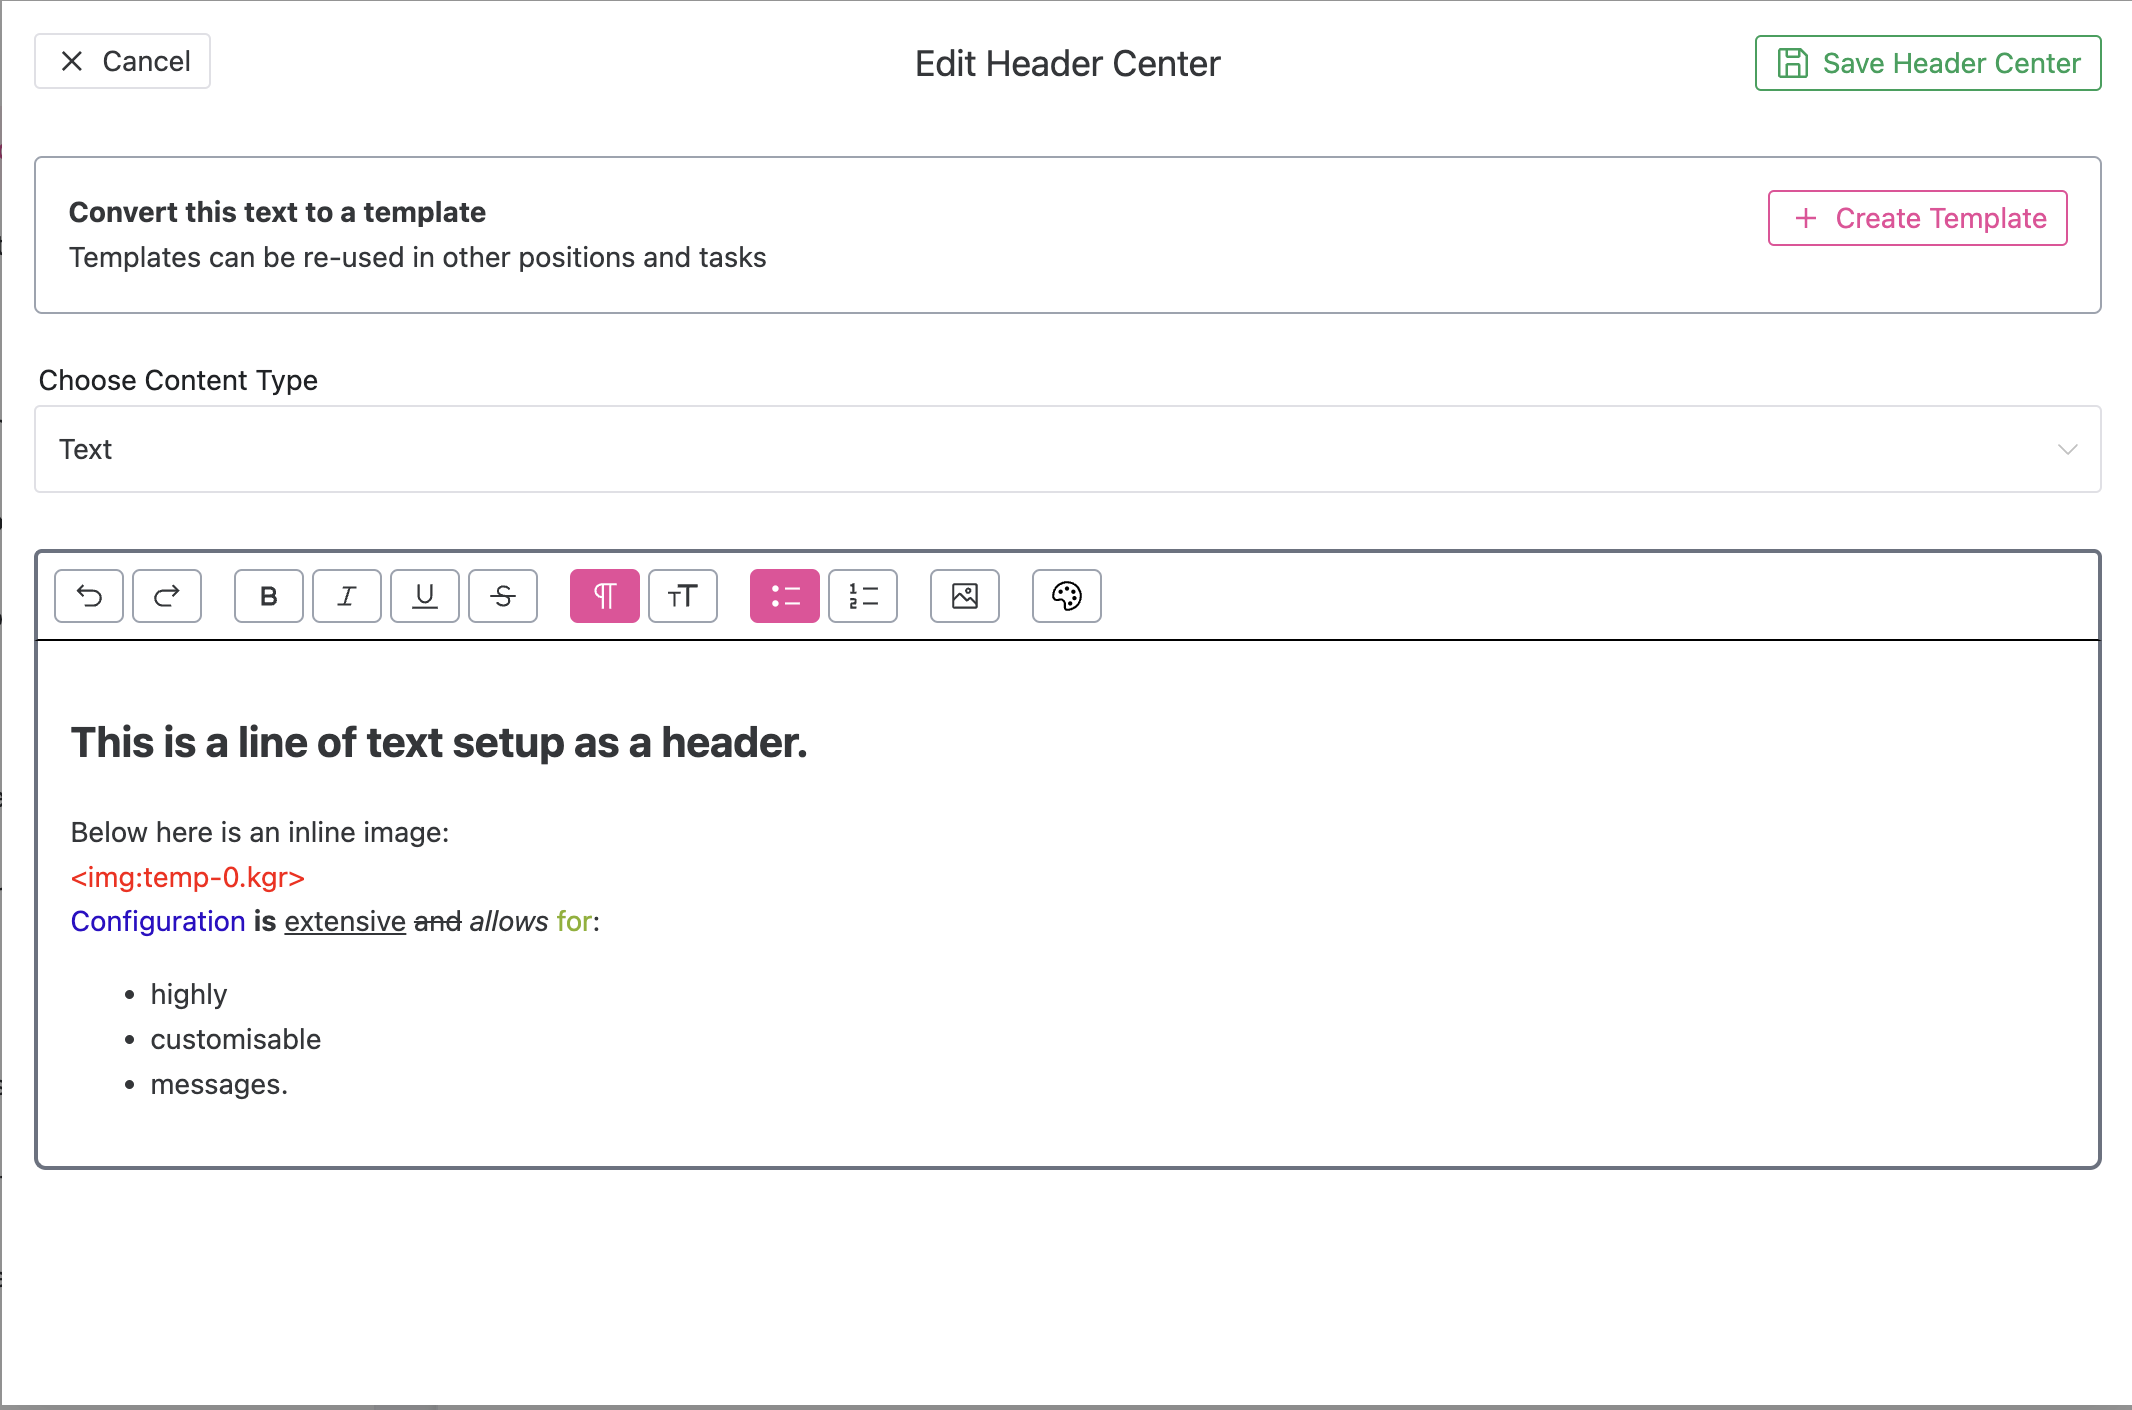
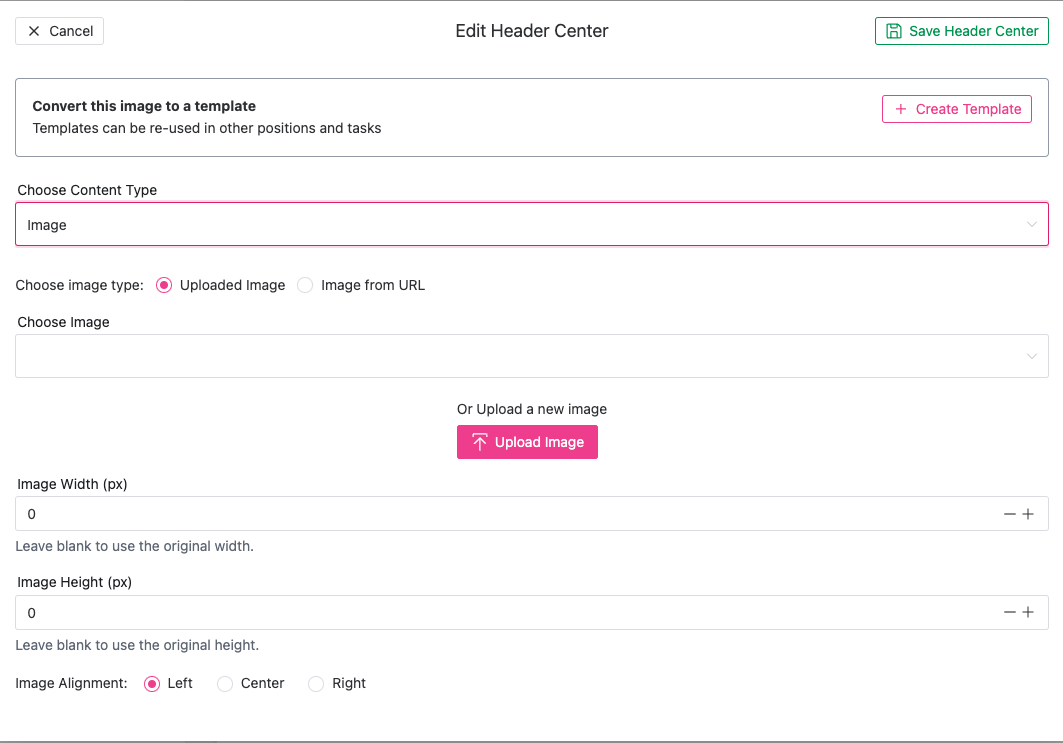
Image
Add an image which is placed in the folder img, next to the phar file on the server. Be sure to specify the size of the image.
Here you can also format the image you’re attaching to your task, this can be a company logo for example. Create a label so you can reuse in another task, a filename which will be the name where the file is saved in your folder. Decide on the size and alignment of the image to give your message the best look. Uploaded images can be found and managed in the “Templates” tab.
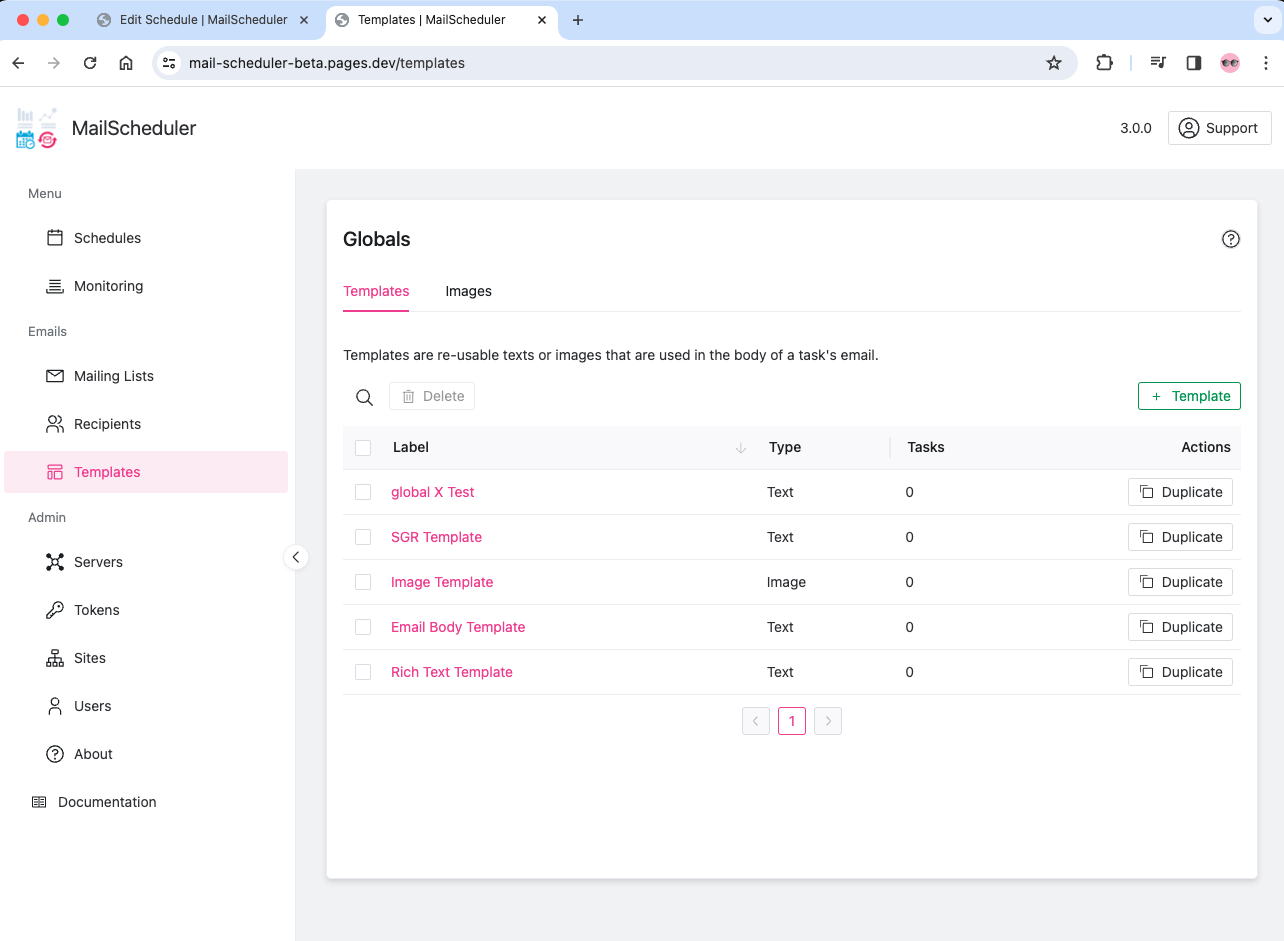
Templates
Reuse a template from the list. Here will show all the labels of your stored text and images to reapply to message elements as you see fit. Templates can be linked to a task via the import/export schedule tool. You cannot create a new template from a csv file. This must be done in the MailScheduler front-end. Templates with views only work within a task targeting the same workbook, as these views are only available within this workbook.
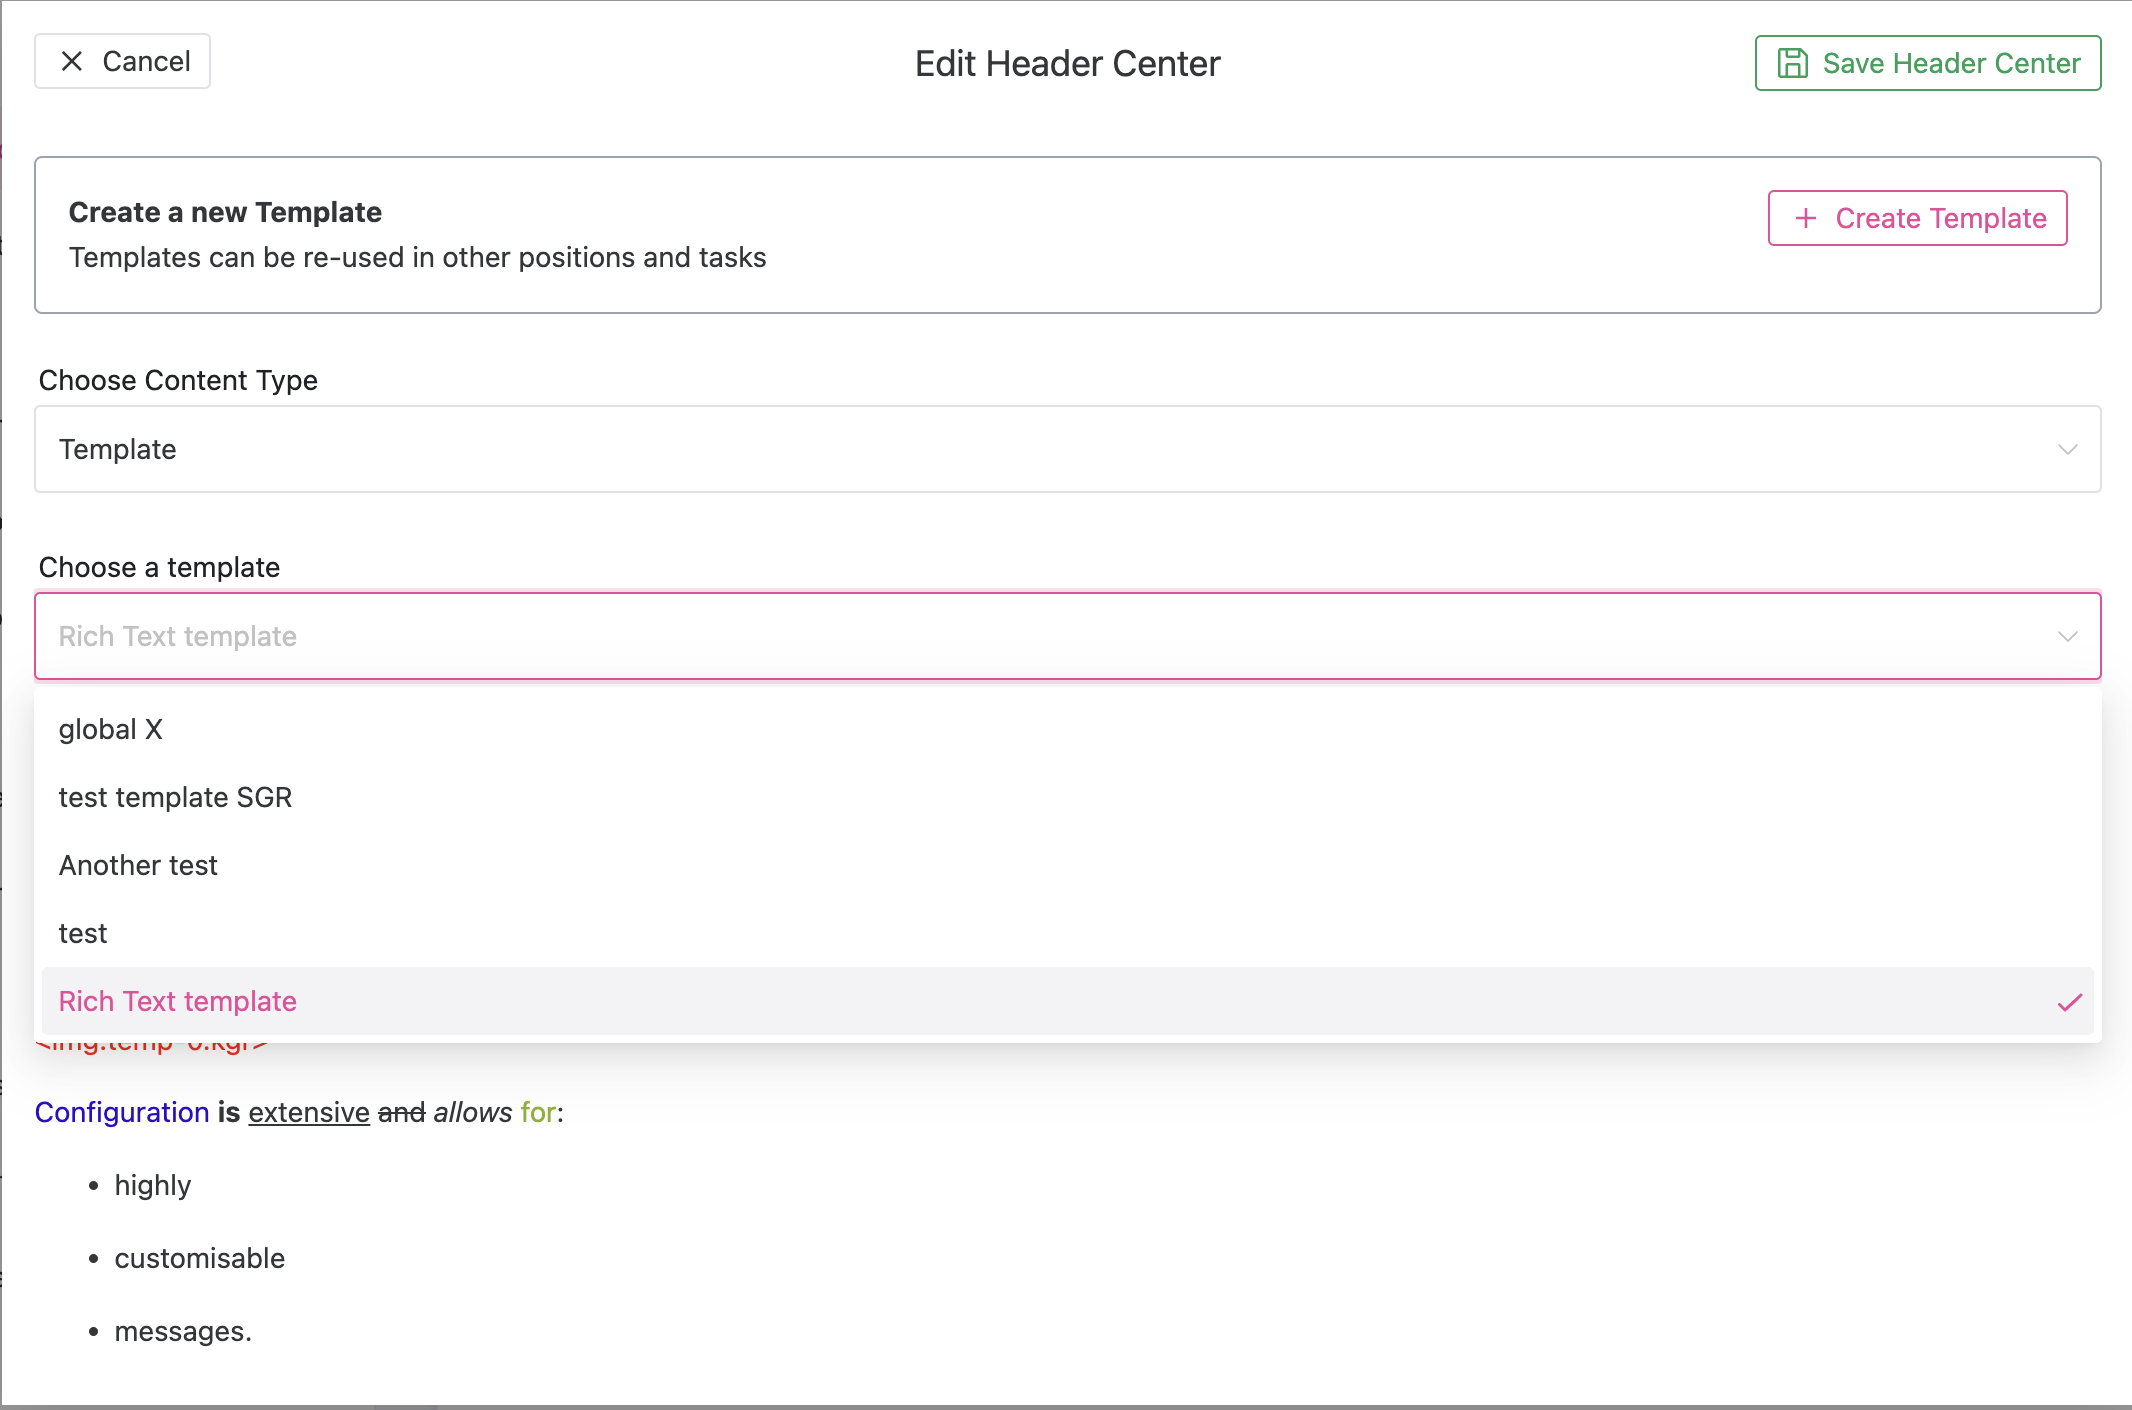
Manage templates and uploading images in the Templates tab.
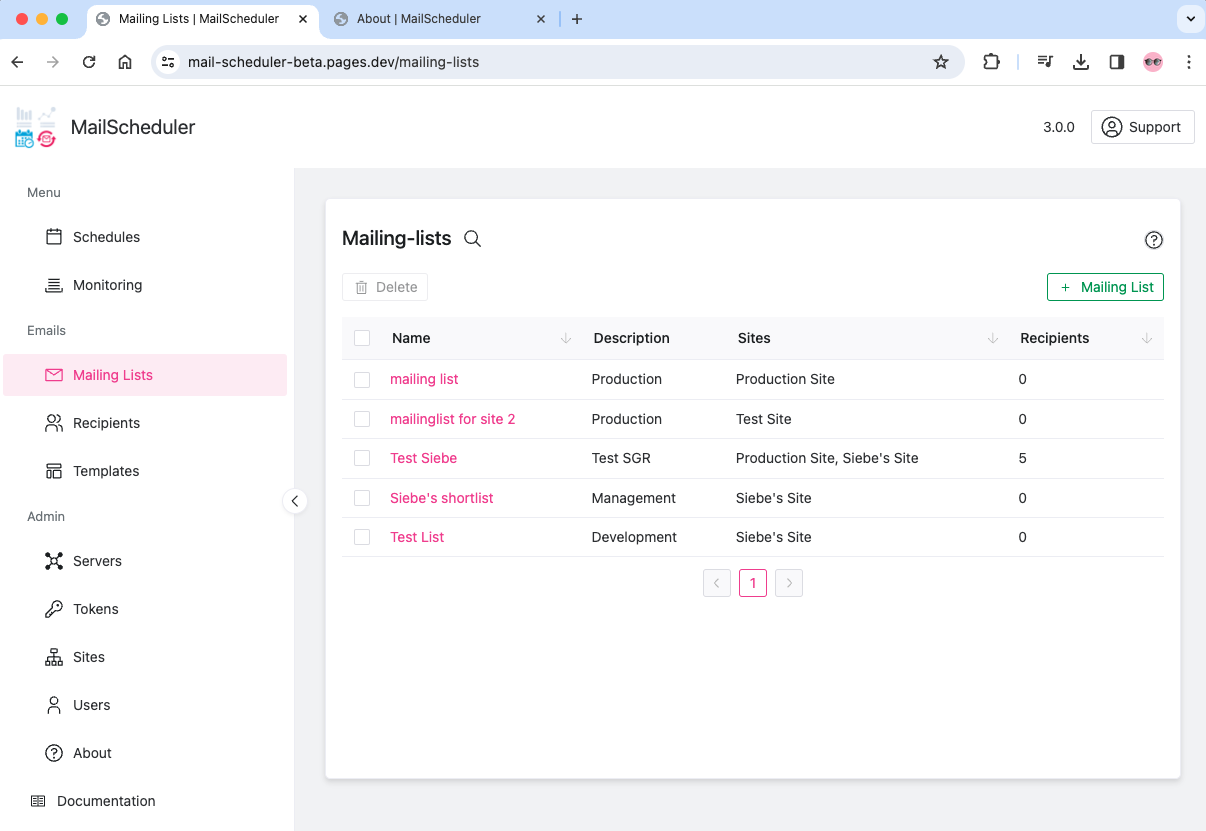
MailingLists
The mailing list has a name and description. Creating a new mailinglist involves selecting which sites will be required. Upon creation, recipients can be added to the Mailinglist.
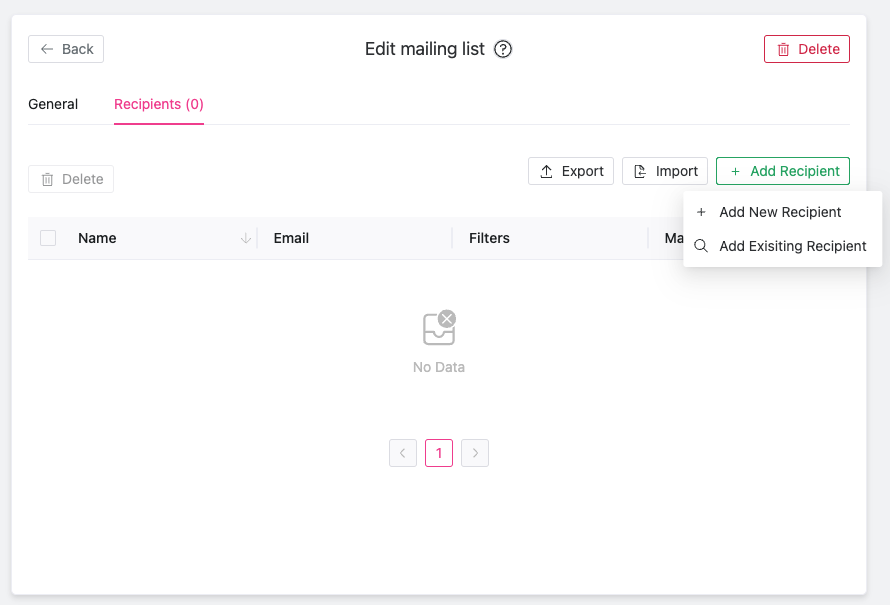
Recipients
When importing recipients, the options are:
- Manually searching for an existing recipient within other mailinglists
- Creating a new recipient with a name, email address and (optional) filters
- Importing a list of recipients based on a CSV
When importing recipients, the CSV format should be:
Name;Email;Site;”Filter key”;”Filter value”
Incorrectly formatted rows, such as an invalid email address, will be bounced when importing. A prompt will allow you to download the incorrect rows, edit them accordingly, and import them again.
The Recipients tab shows an overview of existing recipients, and allows to edit individual recipients. To add or bulk edit recipients, go to the Mailinglist tab and add them to the desired mailinglist.
Filtering
Filtering can be done on multiple levels, at multiple stages of your MailScheduler configuration. Filtering can also be done in the Dashboard itself by setting your workbook filter to “All unselected”. Be aware, filter are case sensitive.
Caution: When there is no filter applied all data from the dashboard will be visible.

By defining a Filter Key and Filter Value, being a dimension and a value respectively, filters can be applied at 3 different levels/locations in MailScheduler. Any filter can now include a parameter from Tableau to represent a Filter Value. To do that, prepend the parameter name with “Parameters.” An example using a parameter call “week_number” in order to filter on the value stored in the parameter:
(week_number => Parameters.week_number).
Filtering through Recipients
A recipient can have specific filter values attached to them. This filter will apply when a Task or View specifies a Filter Key that corresponds with the recipient Filter Key, while leaving out the Filter Value.
Filtering through Tasks
A task can be filtered. To apply a filter to the whole task, apply a filter here.
When leaving the filter value empty, but specifying the key, the scheduler will look in the mailing list if there is a matching filter that will be used.
Filtering through Views
A filter can be applied on the view level. If you want to use the filter only on this view, specify it here.
When leaving the filter value empty, but specifying the key, the scheduler will look in the mailing list if there is a matching filter that will be used.
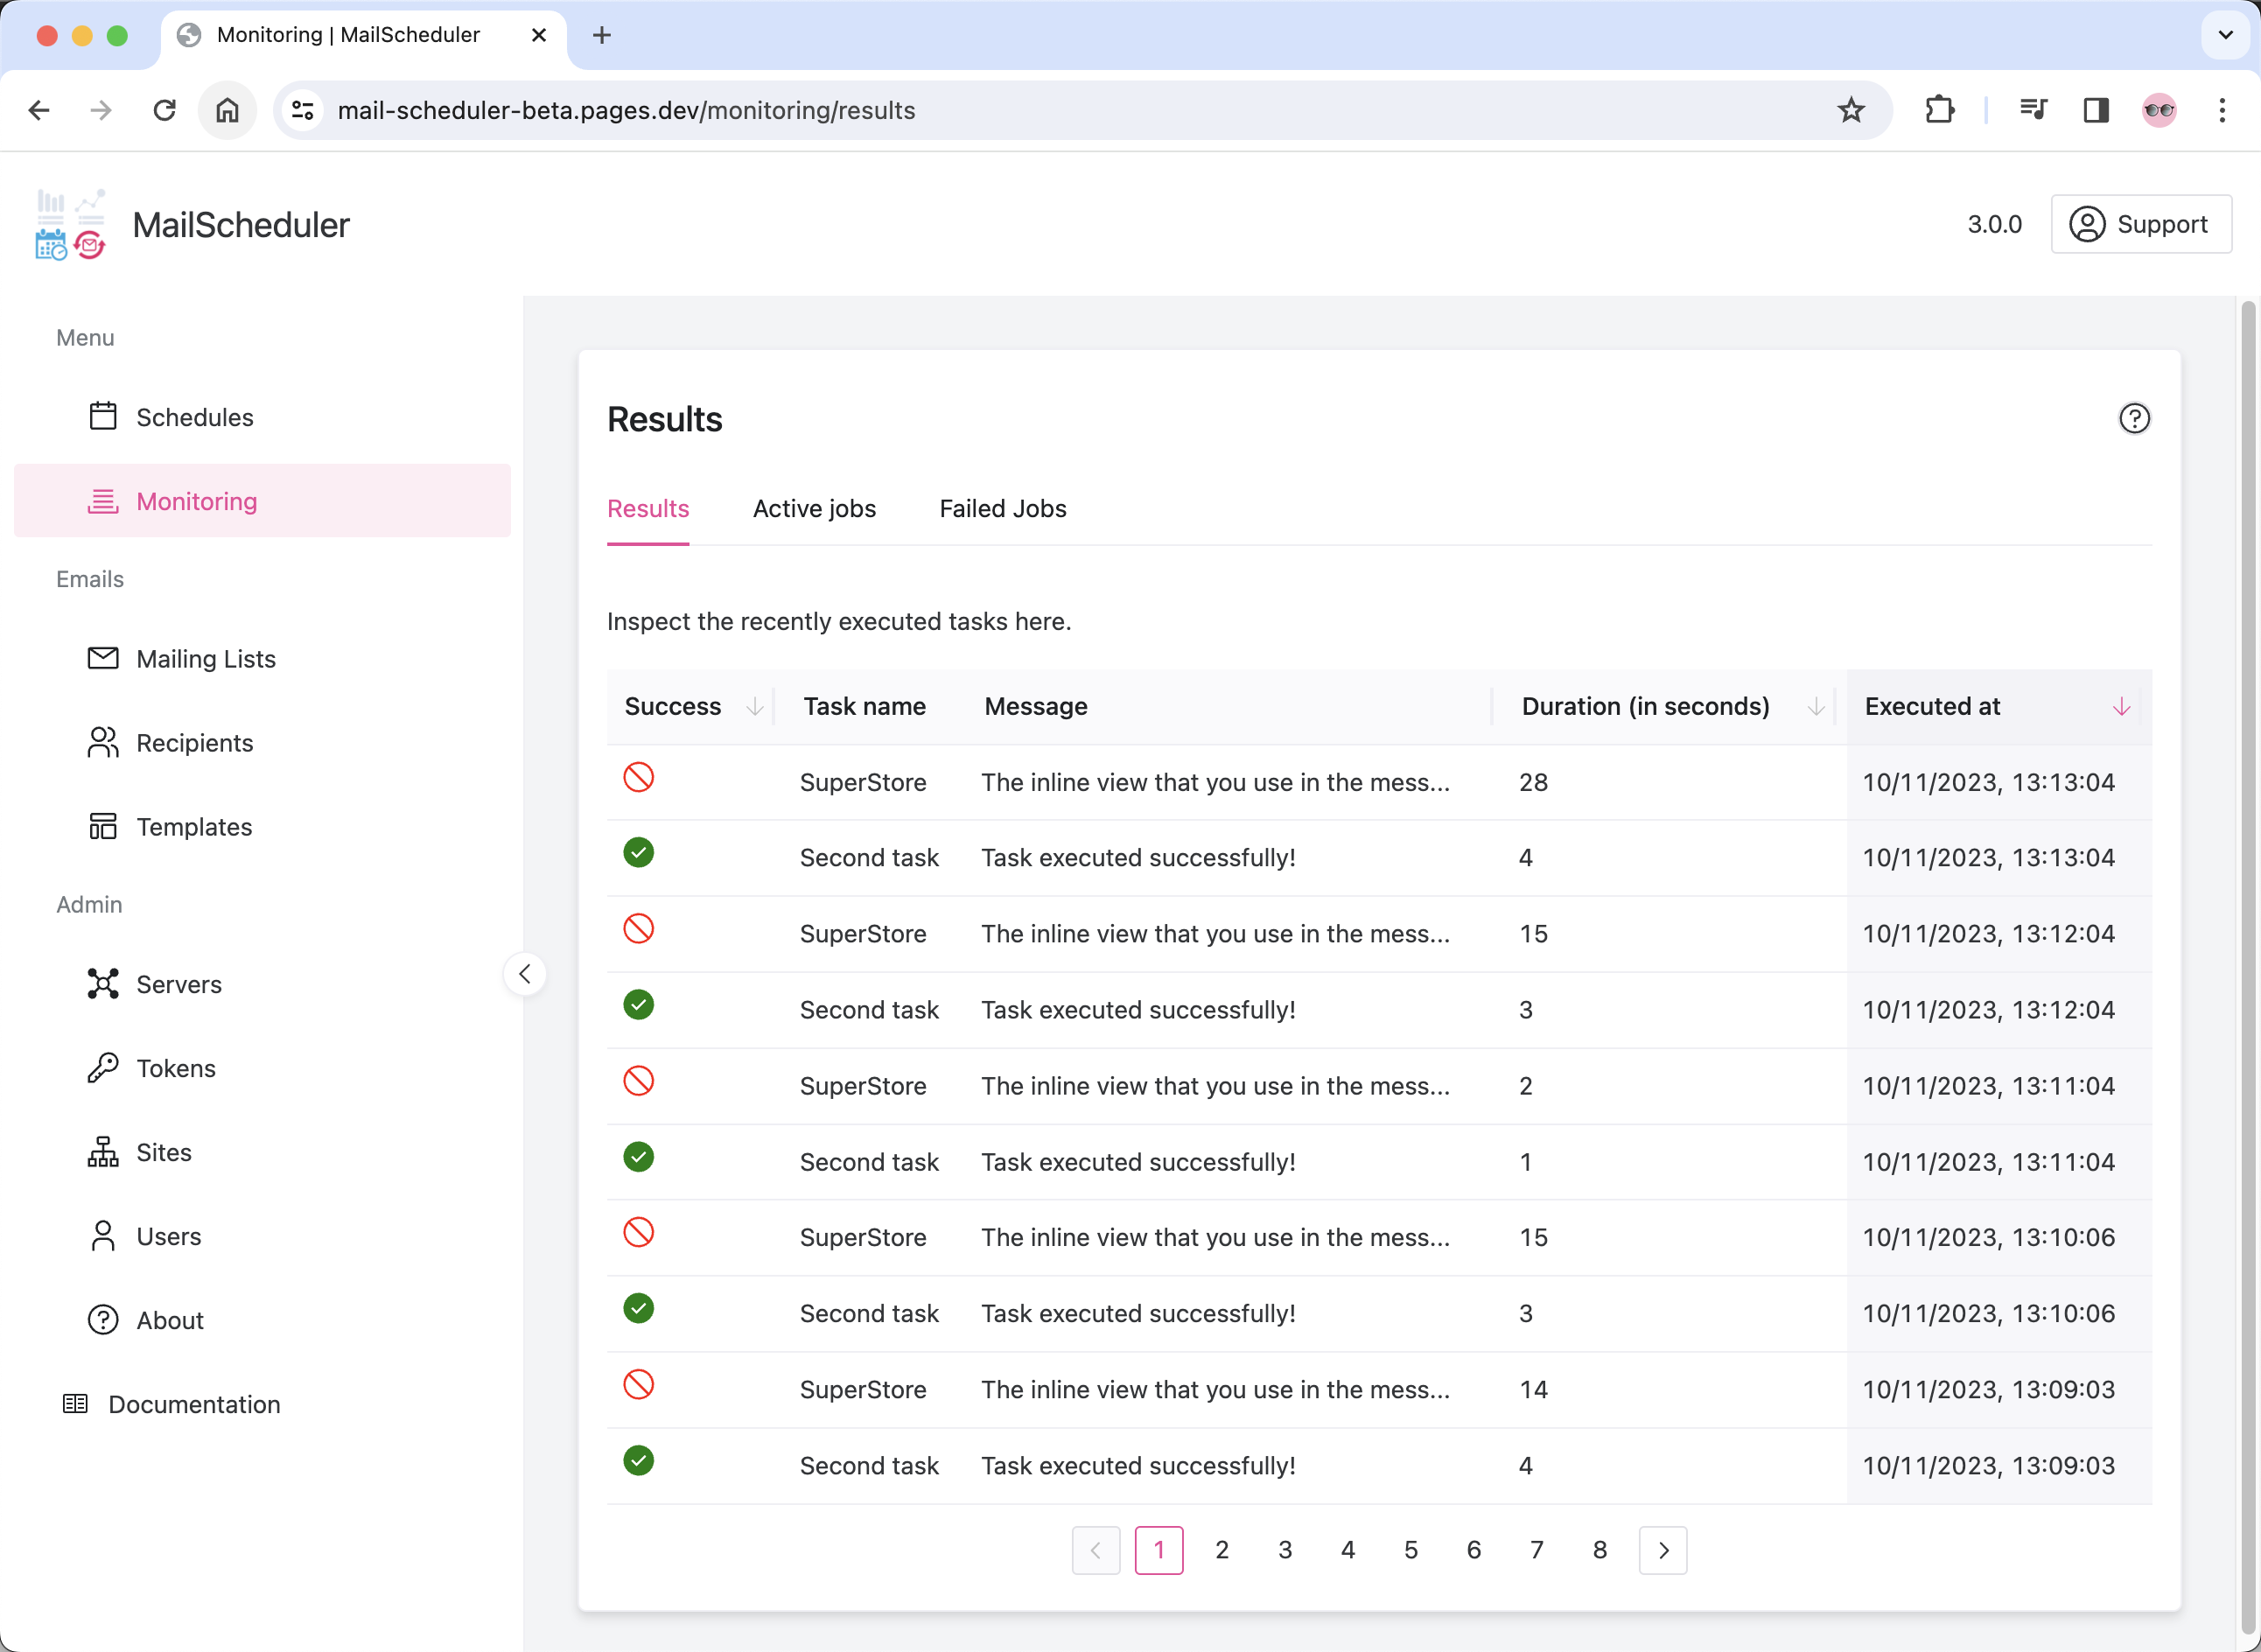
The Monitoring tab shows the results of tasks, the active tasks currently being executed and any failed tasks. Failed tasks can be re-triggered in case of temporary issues, or examined further for structural errors. Information regarding successful or failed tasks can be seen in the message attached.
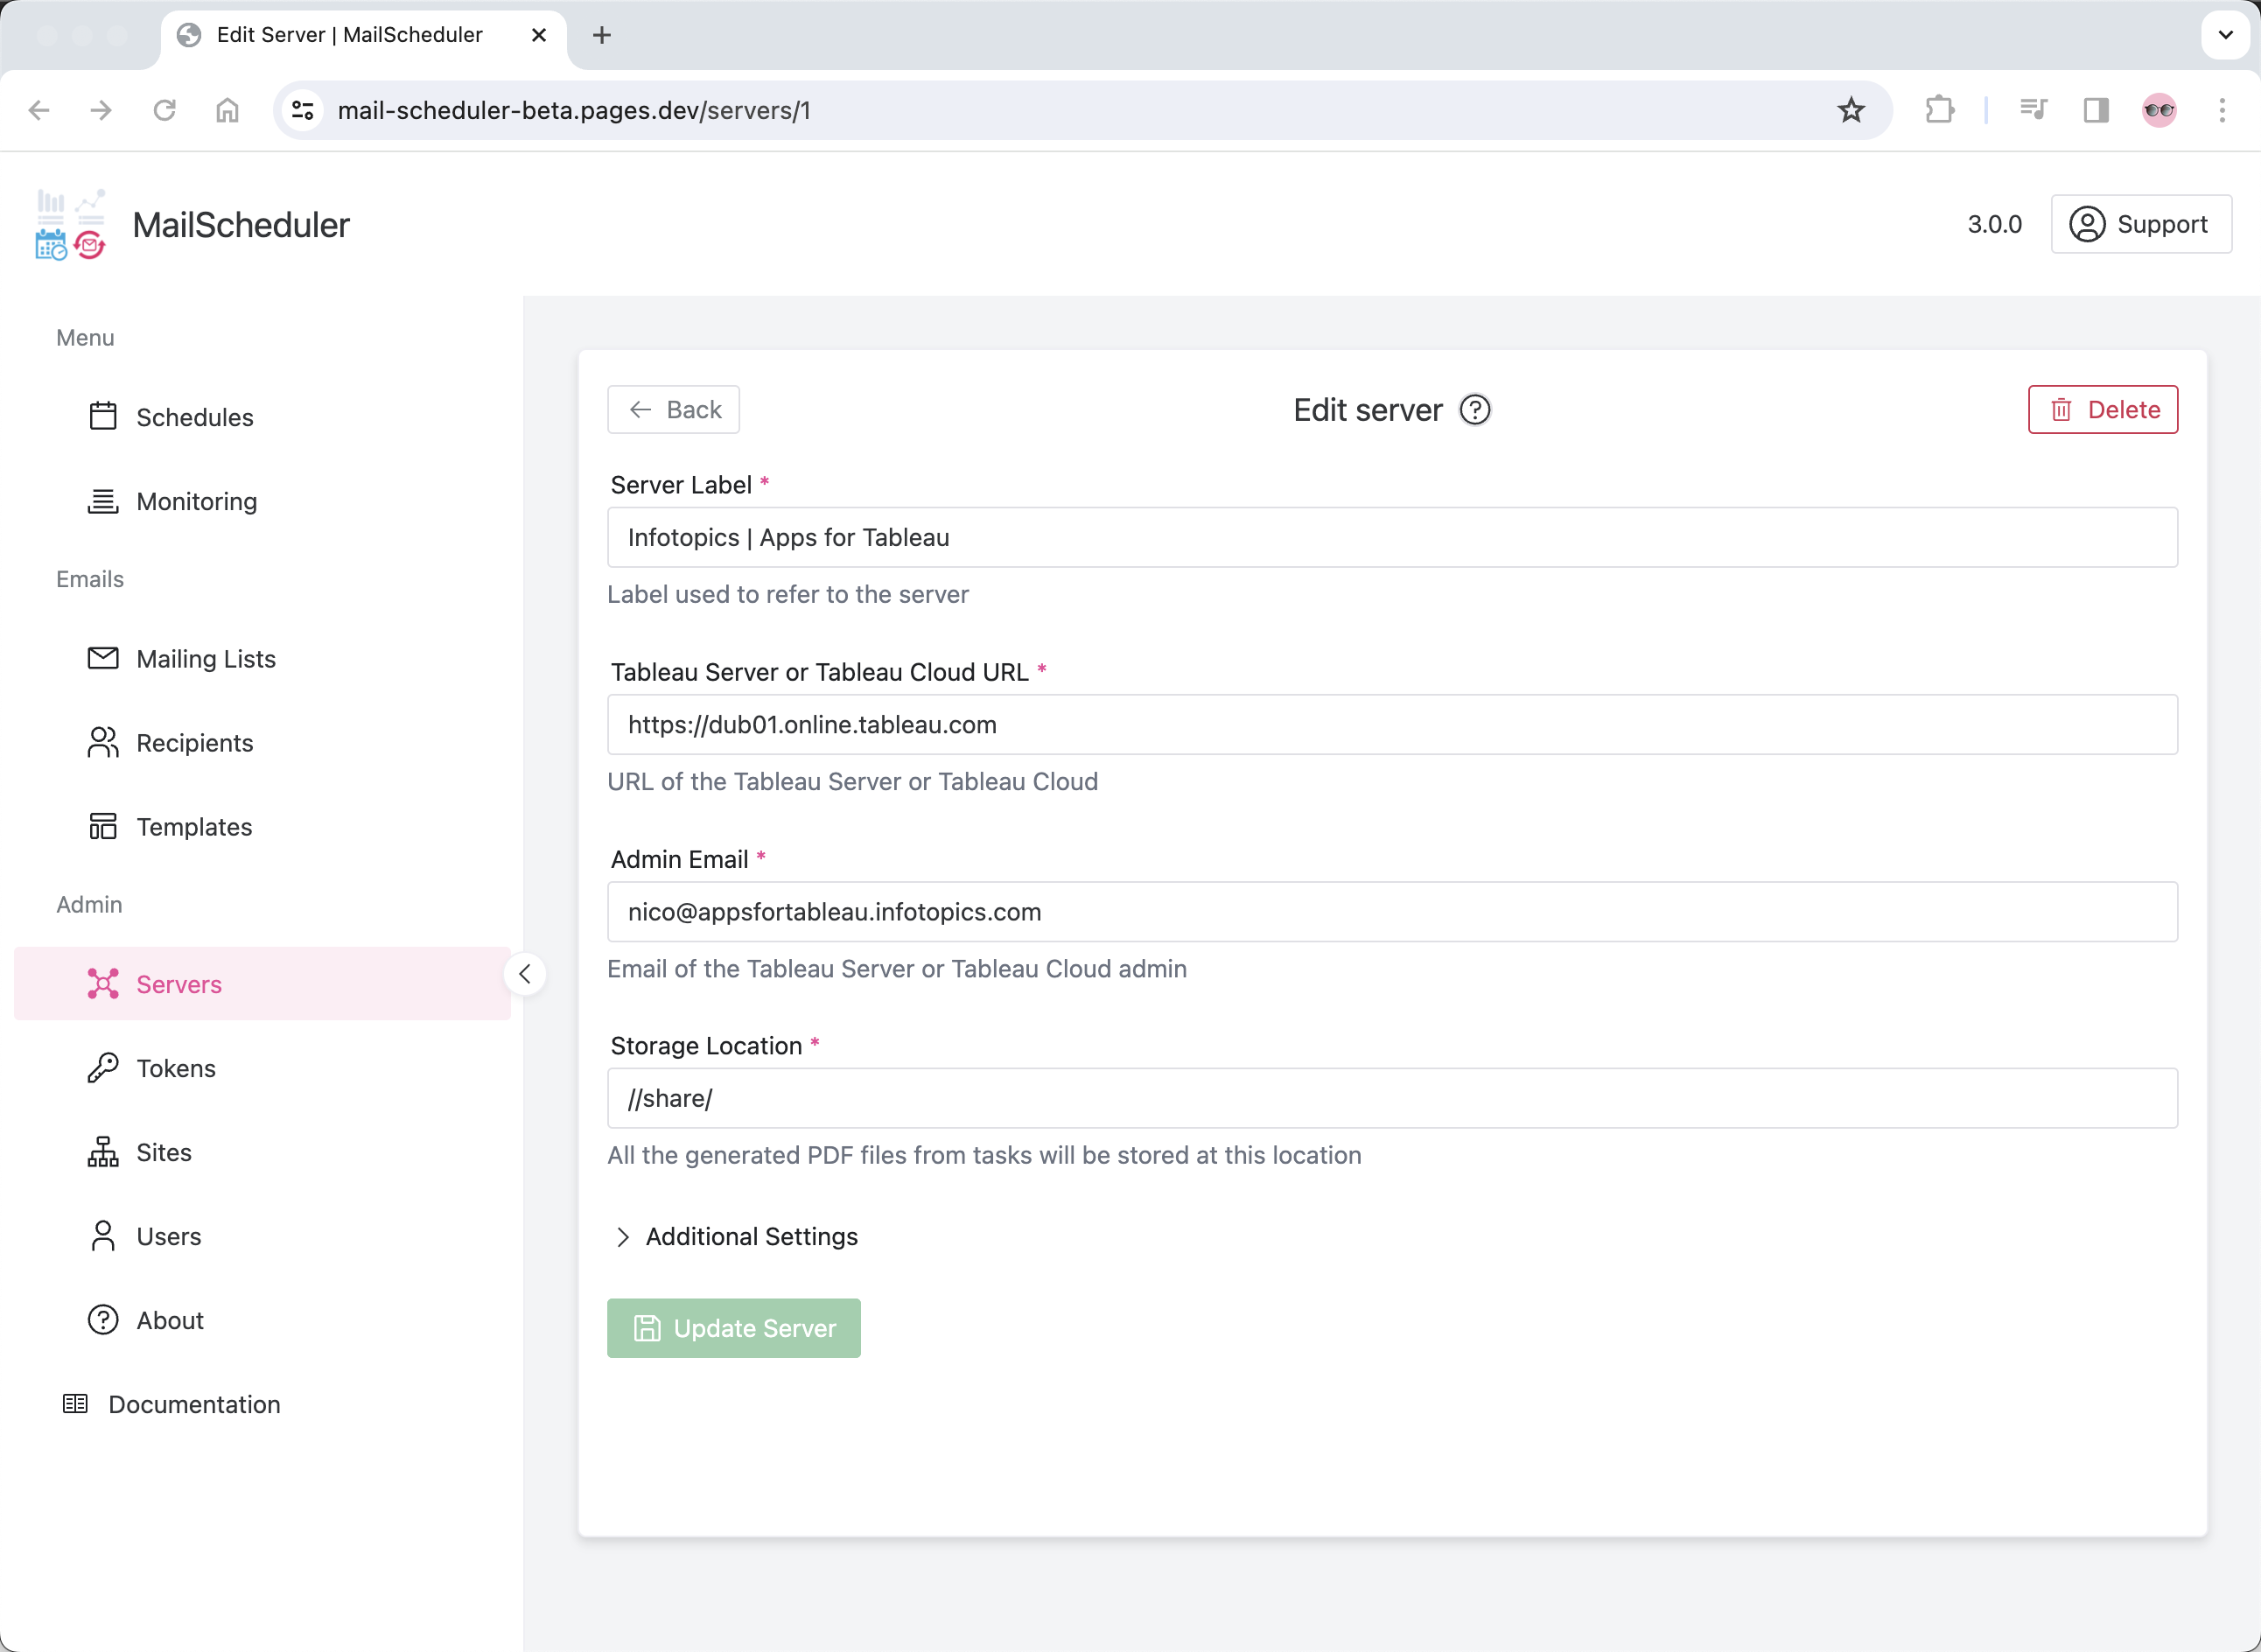
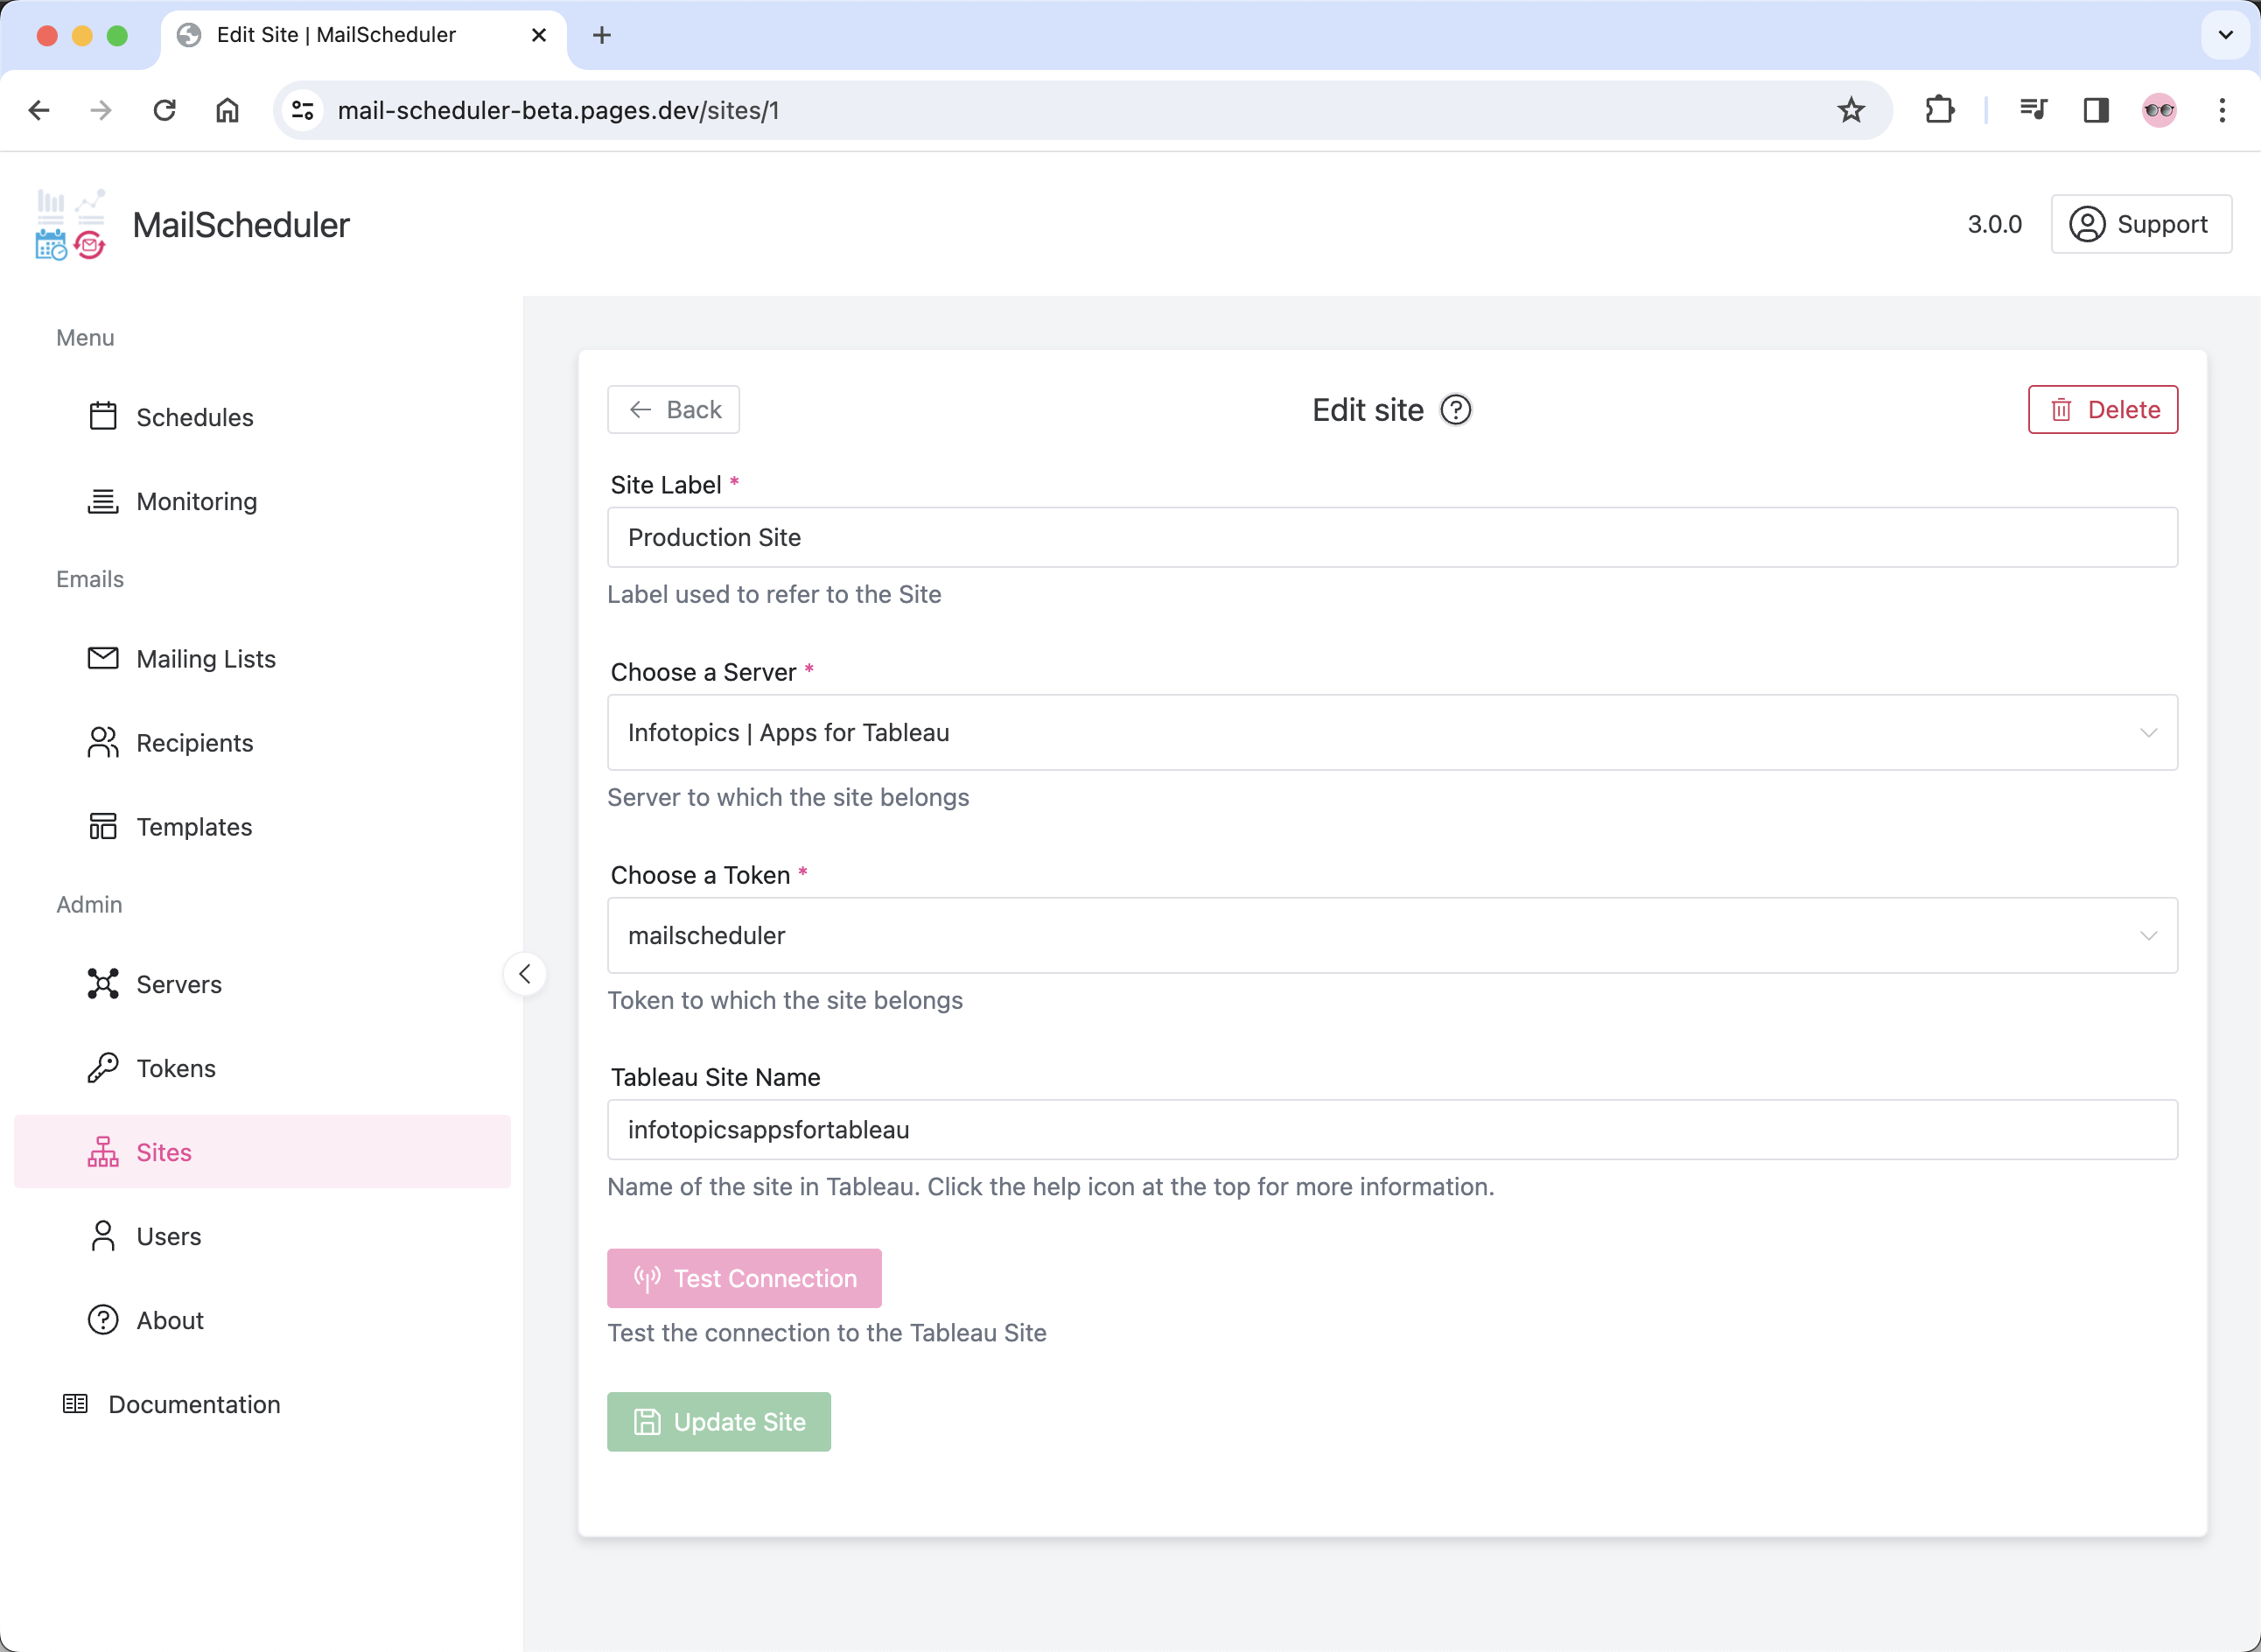
Servers are the Tableau Server or Tableau Cloud environment on which the dashboard are hosted. Using a server and a token, a connection can be made to a site and the dashboards within. Certain configurations might need to be aligned between Mailscheduler and Tableau, such as the CSV delimiter (see additional settings).
Token Name and Token Secret
A user with permission to the site and required dashboards should have (or create) a Personal Access Token (PAT). The Token name and secret should be entered here. Personal access tokens will expire if they are not used after 15 consecutive days. If they are used more frequently than every 15 days, an access token will expire after 1 year. After a year, you must create a new token.
Test Connection
Use the test connection button to verify all is working before saving, you will be prompted with a message in green if the connection is valid, or red if there’s an issue. Double check all fields to see if there’s an obvious mistake such as an empty field, if there’s an error you do not recognise you can contact us through support through email at [email protected].
For Tableau Online, each site needs its own PAT with the right permissions.
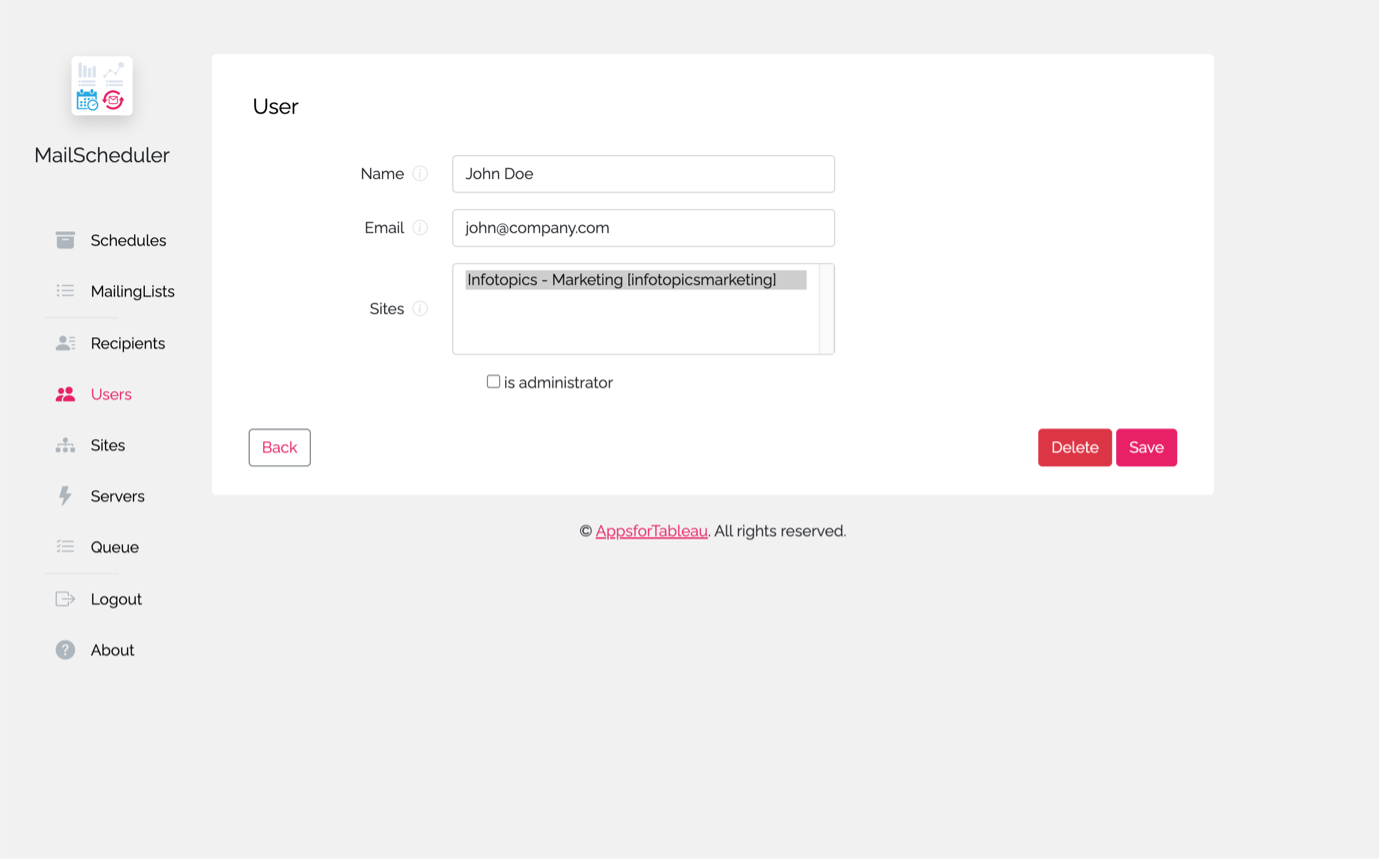
Users have a name and email. They can be assigned to multiple sites they can create mailing lists and schedules for or maintain when they are an admin. When a user is added, he will get an invitation to add a password and log in to the MailScheduler.
Users can either be Admins or normal users. Admins have access to the tabs in the Admin section (Servers, Tokens, Sites, Users, About) and can see all schedules, mailinglists, etc regardles of what site they are related to. Sites in the MailScheduler are separated: When a user has access to only site1, he cannot see site2, or schedules and mailing lists connected to site2. Recipients are connected to a site, so a (non admin) user can only see recipients connected to sites the user has access to.
In the about tab, the system log can be found. This can be useful for debugging.
We love to make solutions and help Tableau users to do things more efficiently. If you have feedback, ideas, questions or need support, please share them with us! Also, don’t forget to follow us on social media for our latest news and updates.